


No matter what kind of project I happen to be building, applying a finish is always the most tedious step. Cutting, gluing and joining wood is a lot of fun. Sanding and applying a protective finish on the pieces can get very arduous. It also is a pretty slow process to do a good job. I usually spend about the same amount of time finishing a project as I do constructing the project. Sometimes even longer.
I could have slapped a coat of paint on everything in an afternoon and said, "good enough," but that would have negated all the careful hours I had spent building the cabinet. Quality construction requires a quality finish to be applied even when it becomes wearisome. I've never finished a project and thought to myself, "I wish I hadn't spent so much time applying a finish." Usually it's the other way around.
One thing that helped was that I had done most of the sanding already as I worked on each piece, so that was done. It greatly helps to break the sanding up into smaller units of work spread out over time than to have one marathon brain-numbing sanding session. Also, it's usually easier to sand the pieces when they are a single flat panel than it is to sand them after they've been glued and screwed together. So thankfully about 90% of the sanding was already done.
The type of finish for this cabinet was going to be simple: latex paint. Well, simple in selection but not necessarily simple in application. No finish type is simple in application if you want it to look nice when you're done. Selecting latex paint was mostly a matter of convenience. The cabinet was going to be painted opaque colors, so polyurethane wasn't a good choice. I didn't want to hassle with hauling all the different pieces in and out of the house and waiting for nice weather days, so using my lacquer spraying equipment was ruled out. Cans of spray paint were an option, but it was difficult to find the exact blue color I wanted using off-the-shelf spray cans. Also, I've never had much luck getting a nice finish with enamel paint from a spray can, and using spray can lacquer gets me back to trying to spray outside so I don't poison myself and my family with the fumes.
That left me with latex paint as the most convenient option left on the table. It's easily available at any hardware store. It's pretty straightforward to apply with brushes and rollers. The fumes are non-toxic and not completely foul smelling (I kind of like the smell of fresh latex paint; it smells "clean" to me.) It dries reasonably quickly. It cleans up with soap and water. It's also fairly inexpensive. What's not to like?
Well, there are a few things not to like. While it dries to the touch quickly, it can take up to three weeks or more to harden up, if it ever does. Until then it tends to pick up fingerprints and it will stick to anything that it sits on for more than a few minutes. It is very difficult to sand without clogging the sandpaper after just a few strokes. Also, it can be quite difficult to apply smoothly without leaving lots of brush, roller marks, and orange peel so a certain amount of experience and skill is needed to get professional results.
As a side note, it is possible to spray latex paint. I had done it before about 35 years ago to repaint a 2nd hand desk I bought at a garage sale that originally was a depressing olive green color. It actually turned out very well. I had to really thin the paint down, and make sure my spray gun was completely clean before and after I was done, but it worked. I briefly considered revisiting the spray latex route, but I didn't want to spray inside and seeing as it was February in South Dakota when I started applying the finish, that wasn't a practical option.
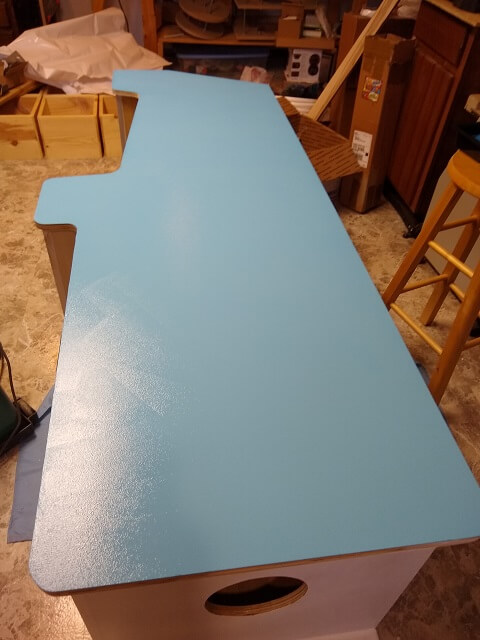
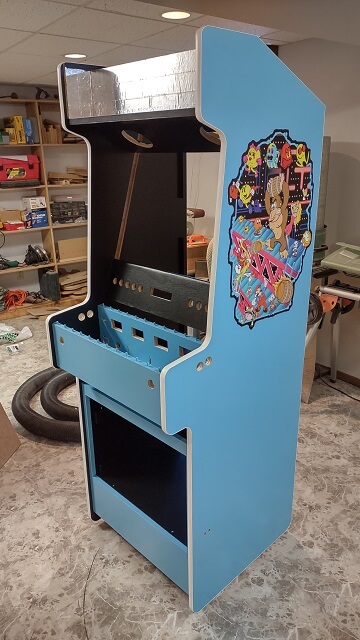
The color scheme on my cabinet was loosely based on the colors used on the old Donkey Kong cabinet from 1981. Light blue and black, with white T-molding and red controls. I traveled to the home center with a picture of one of these cabinets on my phone, and hunted through the paint chips until I found the exact shade of blue I was looking for.
As it turns out, solid black was actually a rather difficult color to find in latex paint. Apparently painting your family room walls completely black isn't a popular option. A lot of the colors would get kind of close to black, but have a noticeable mix of other colors in them. After a lot more time looking at paint chips I finally found a shade of black that I was satisfied with. If a person were to really stare at it, the black paint does have just a little hint of blue. However, when placed right next to the light blue paint it isn't enough for my eyes to pick up so I deemed it "close enough." The guy mixing the paints at the counter said he had never seen anyone buy such a dark black shade of paint before. So I got that going for me, which is nice.
I estimated that two quarts of paint should be enough to cover this whole project (one quart of blue and one quart of black) which I think was about right. Well, it was until I accidentally knocked over the quart of black paint on the shop floor and lost about half of it. Oops. Back to the home center for another quart. Oh, and black paint is really a pain to clean up from the shop floor.
Rather than cheaping out and buying the least expensive paint in the store, I spent a little extra to get a quality paint. Because I didn't need much paint for this project it didn't add a ton to the overall cost of the cabinet to go with the good stuff. Nicer paint makes for a nicer end result.
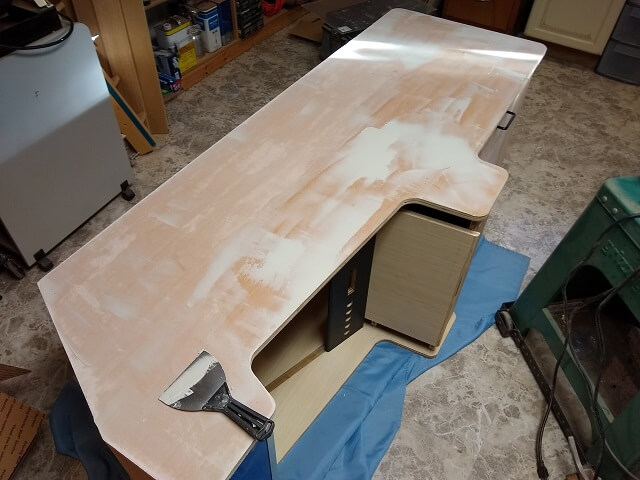
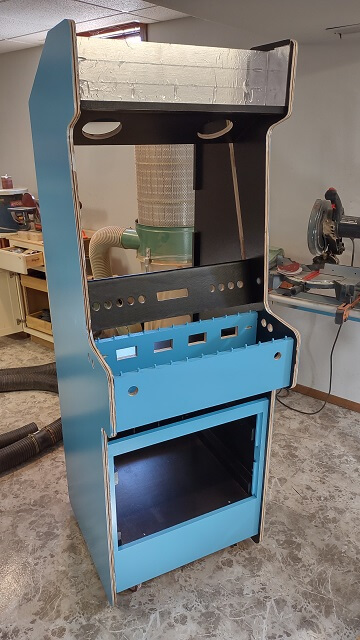
I didn't try and paint the entire cabinet all at once. I went piece by piece and section by section. It was a lot easier to "eat the elephant" if I did it one bite at a time. I decided to start my painting process on one of the sides of the cabinet. I laid the cabinet on its side to make it easier to work on.
Successfully getting a smooth finish starts with making the base surface smooth as possible. Obviously sanding is a good first step. The plywood I was using had some open pores and minor imperfections. In order to fill these little voids I started by applying a layer of drywall mud to the wood. I didn't need a ton of mud that I would just wind up sanding off later, so I used a drywall knife and really worked the mud into the pores, then scraped off most of the excess.
When possible, I would try to work on multiple pieces at the same time to try and speed the process up. While I was painting the side of the cabinet I also painted the sides of the control panels. I only worried about the sides, as the bottom wasn't going to be visible when in use and the tops would be covered in vinyl. Actually, the sides for the most part won't be visible either, but I thought it would help in case any of the sides of the panels could be seen in the cracks after getting set in place. Notice that for this reason I also didn't bother using drywall mud to fill the sides of the panels and make them smooth. That would have taken a lot more time and really would never be noticed by anyone but me, so it wasn't worth the hassle.
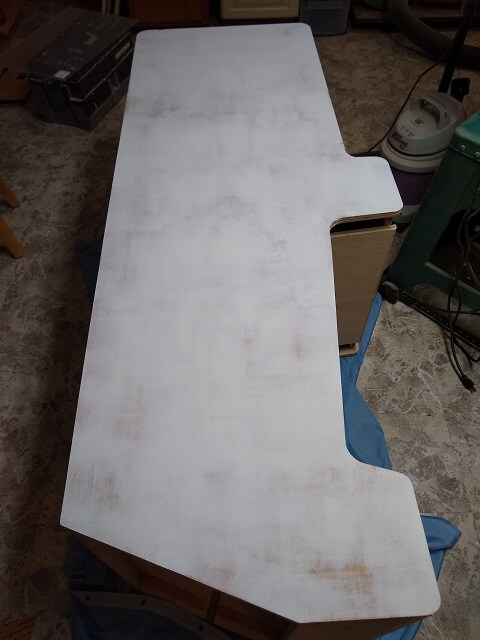
In order to help the color coats of latex stick to the wood I started with a couple coats of primer. The first coat of primer really soaks into the wood and looks uneven. When it was dry I would give it a good sanding to make it smooth. This makes it look even more uneven. And because the primer I was using was also latex based, it was a real pain to sand smooth. The sandpaper would clog up, and if I didn't stop constantly to clean off the paper I would get little balls of primer that would heat up and then randomly adhere themselves to the wood in a very noticeable bumps that were really difficult to remove.
Once sanded smooth, a second coat of primer was applied. This coat went on a lot more even than the first coat, so the coverage looked a lot better. Once again, after it had dried I sanded it smooth again which went a lot faster as this coat didn't have as many imperfections.
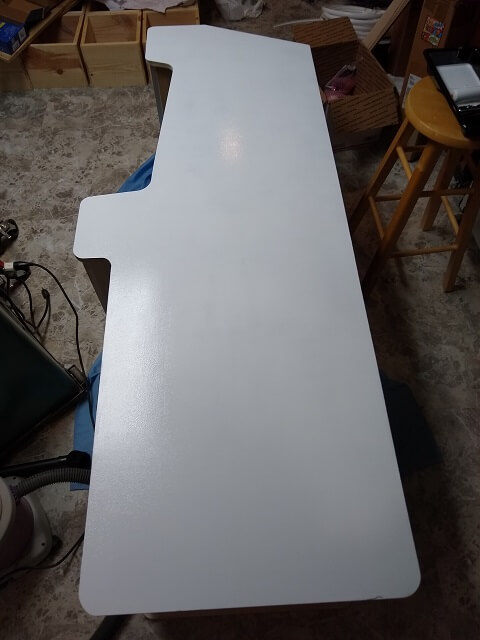
After the two coats of primer I applied two coats of color. The first coat got me about 95% of the way there. The second coat covered the little spots of white primer that were still peeking through in places. Note that all these paints in the store boast "one coat coverage", but in reality unless you slather the paint on way too thick it's going to take at least two coats. Cheaper paints might even need three coats, but I found two were sufficient for the paint I was using. Between the two coats of color I only sanded the spots that had noticeable imperfections, runs or dust nibs. Oh, and before every coat of paint (primer or topcoat) I would use the brush attachment on my shop vac to suck up any sanding dust or dirt, then I would wipe everything down thoroughly with a tack cloth.
Applying the top coat is an art that gets better with practice. Most experienced painters will talk about maintaining a "wet edge." Basically this means that you apply paint to a small section, then immediately paint an adjacent section. Once a section has paint applied you do not go back and roll or brush over that section again, otherwise you will introduce brush marks, lines and bumps. If a section needs more paint, then you have to address it by adding another coat.
In order to try and make things as smooth as possible, I took a couple of measures. First, I mixed an additive into the paint called "Floetrol." This slows the drying time of the paint with the idea that it will give the paint more time to level itself out before it dries. Note that this product is only added to the color coats of paint, not the primer. The other measure I took was to use a smooth foam roller. The surfaces I was painting were smooth, so I didn't want to use a traditional "napped" roller meant for textured surfaces.
So here's a money saving trip when using paint rollers: a quality paint roller isn't cheap, and paint rollers hold a lot of paint. After applying a coat to your project you don't want to just let that paint dry on the roller and wreck it, and if you clean the roller each time that's an awful lot of paint that's going down the drain along with the soap and water. So what I do is this: I use a separate roller for the primer and each color. When I'm done applying a coat, I put the roller in a freezer bag and squeeze out as much air as I can, then put the bag in the refrigerator. The lack of air and cold temps will keep the paint from drying on the roller for several weeks. When you want to use the roller again just take it out of the fridge two or three hours beforehand to allow it to come up to room temperature. The roller is already soaked with paint and ready to use again. The only thing you have to do is explain to your spouse what these paint soaked bags are doing in the fridge.
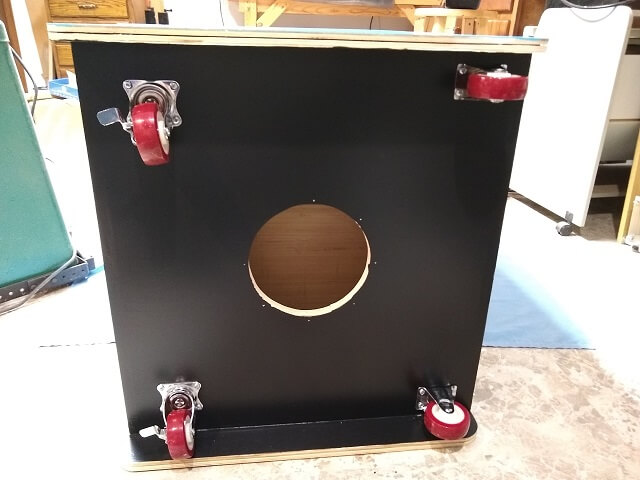
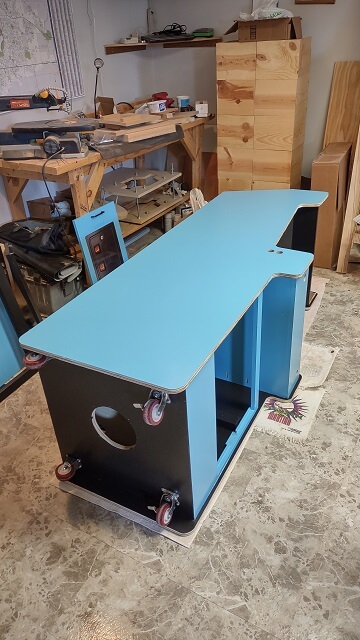
While the cabinet was laying on its side I painted the bottom. It was easily accessible at this point. When the second coat of color was dry I went ahead and installed the casters so when I lifted the cabinet back up I could now easily wheel it around the shop.
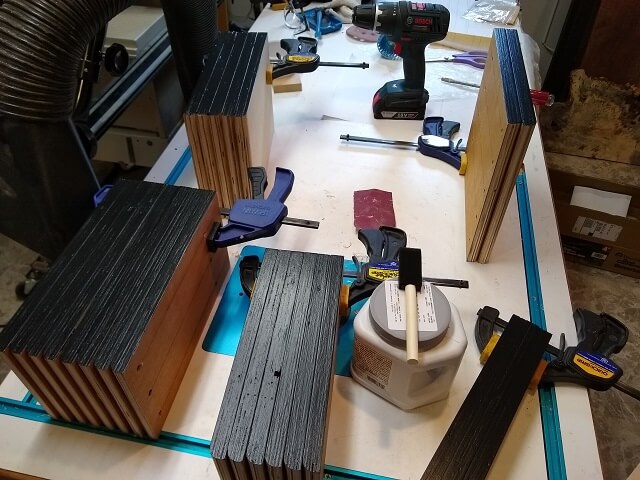
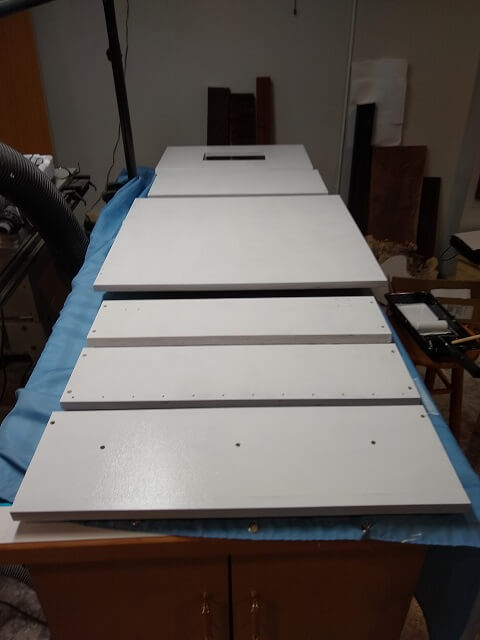
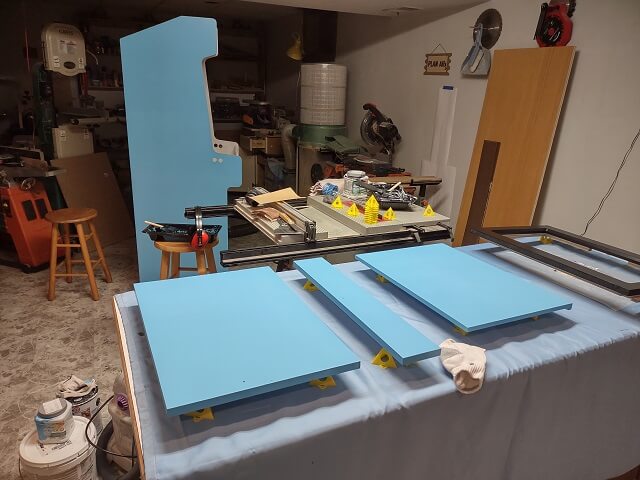
All of the back panels were laid out on my workbench, where they just barely fit. I placed them on spacers to lift them up off of the drop cloth so it was easier to paint their edges. Then I went through the priming and sanding process...
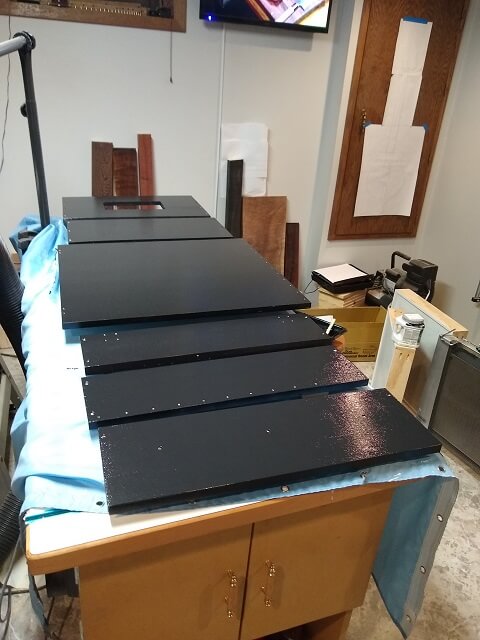
Then the two coats of black paint were applied. Note that this picture was taken right after I applied the second coat, so the paint was still wet. That makes the paint look a little weird in this picture.
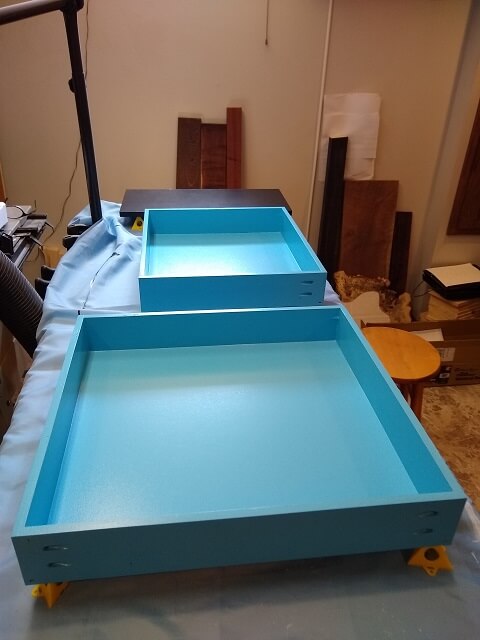
The drawers were primed and painted. These took a little more time because I needed to paint all sides, so there was a lot of painting, drying, sanding, flipping, painting, drying, sanding, flipping, etc.
There were a LOT of pieces to this project. Painting everything quickly became tedious and boring, and when things get tedious and boring it's easy to find excuses to not do those tasks. As a result, before I knew it a year had passed since I started the painting process, and I was probably only about half done. I needed to give myself a motivation kick in the butt to resume the finishing portion of this project so that I could move on to something more interesting.
I slowly plugged away at painting individual pieces and the cabinet.
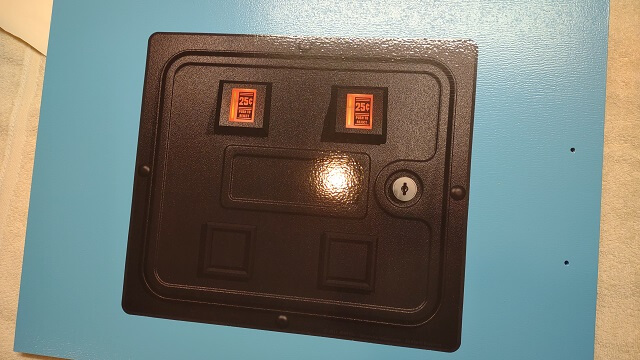
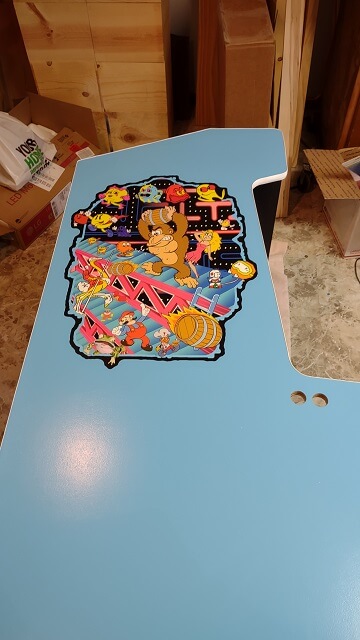
After I had finished painting the front door of the cabinet, I took the opportunity to apply the coin box decal. Yes, I know a real coin box would look a lot better. However, that would add additional cost to my already ballooning budget, plus the depth of the rear of the coin box would interfere with my storage drawers. No decal was also an option, but the area looked too plain to my eye. I decided to go with the coin box decal. If I hate it, I could always peel it off later and leave the door plain or go with a different style of artwork.
I went into applying the decal with some nervousness, but as it turns out it was not a big deal at all. The most difficult part was getting the decal centered on the door. I spent a few minutes carefully measuring and positioning the decal until I was satisfied. I used blue painters tape to temporarily stick it in place. I then carefully peeled off about a third of the decal from one side of the backing without moving the other two-thirds that were taped in place. I cut the backing off from this third, then using a felt-covered squeegee (which I purchased along with my graphic decals), I carefully stuck the decal down, moving from the inside of the decal to the edges.
Once I had that side of the decal stuck down, I then removed the painters tape from the remainder of the decal. The backing was slowly peeled off as I carefully squeegeed down the remainder of the decal. Once the whole thing was laid down I worked out a few tiny air bubbles (there were a lot fewer than I expected) and then I was done! The whole process took less than ten minutes from start to finish.
I continued painting the cabinet. When I moved to the front of the cabinet, there were places where the blue and black paint would bump up next to each other. Because darker paint usually covers lighter paint without too much trouble, I started by painting the blue areas first. I taped off some spots just to keep the excess paint from getting too out of control, but really this step probably wasn't necessary.
With the blue paint done, I then started with the black paint. It can be tricky to get a crisp line where two colors of paint run up next to each other. Simply relying on tape alone usually doesn't provide satisfactory results as the paint will "bleed" under the edges of the tape leaving a ragged line. The good news is I have learned a simple solution to this problem, which I demonstrate on this page.

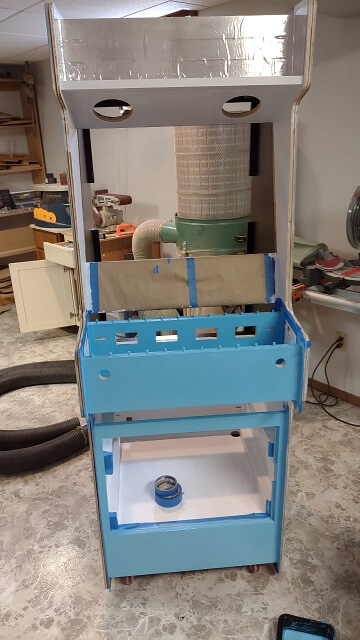
On the inside of the cabinet where the drawers will be located, I found it very difficult to get the paint applied smoothly. There were just too many corners and edges. I probably could have taken more time and done a bit better job in this area, but admittedly at this point in the project I was getting impatient and just wanted the painting to be over. I justified the sloppy work by telling myself that most of this time this area would be covered up by the drawers and nobody but me would see the paint lines. Welcome to my humanity.
After a little more than a year, I finally had the entire cabinet and pieces painted. Boy, was I glad to be done with that part of the project.
There were a few more things left to do that I considered "finishing" activities, but at least they didn't involve paint: the T-molding needed to be installed, and the side art graphic decals needed to be applied.
It was a lot easier to do these activities with the cabinet laying on its side. I put some old towels down on the floor and then carefully leaned the cabinet over on them. After all the effort I put into painting the cabinet I didn't want to scratch it up. This was where it was nice to have a large shop, as I had an area big enough to place the cabinet horizontally and still have room to walk around all four sides.
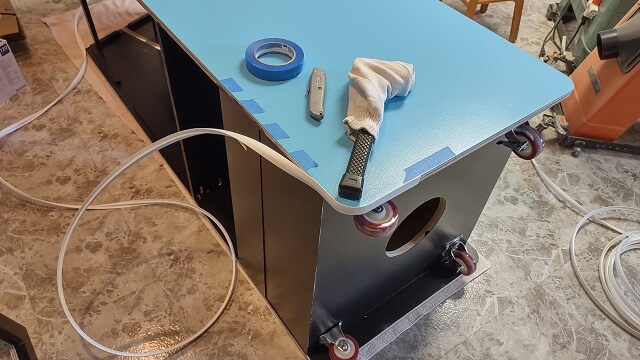
Installing the T-molding was another activity I was kind of worried about. I watched some YouTube videos to get tips and tricks about the process. Then it was just a matter of jumping in and doing it. Because my T-molding was white and my mallet has been used for a lot of other things through the years, I put an old sock over the end to keep the black mallet from marring the white T-molding. I picked a discrete spot on the bottom of the cabinet towards the back as my starting point, and then began to hammer it in.
I'm not going to try and describe the entire process, as there are plenty of other sites on the internet that have exhaustively covered installing T-molding. Straight areas are very simple, so corners are the only tricky parts. I would recommend YouTube videos as a good resource to see how it's done.
I installed the T-molding on one side, then flipped the cabinet over and installed it on the other side. I must admit, The second side looks a little better. There was one spot on the first side that wasn't quite perfect, but is good enough that I can live with the results. The second side is nearly flawless.
Next up was to install the side art. I followed the same process used above when I did the coin box graphic. This side art was trickier to get in the right spot as the graphic itself isn't square so measuring its location wasn't really feasible. I did lay a square across the cabinet just to give my eye a right angle to use as a reference. Most of it was positioning the graphic by eye so that it looked good to me.

The good news is you can't look at both sides of the cabinet at the same time, so if the graphics are off by a few millimeters nobody will ever notice.
With the side art stuck in place, the finishing process was finally complete! Now I could move on to doing other things, which is a lot more fun.
The cabinet it ready to go. Let's make some control panels.
Return To The Main Wood Gallery
This page last updated on 09/21/2023