


The materials page already listed the various consumable materials I used to build the cabinet. This page lists the various bits of hardware that I used to make the cabinet function.
For the most part, an arcade machine is just a fancy wooden box hiding a computer, and giving the user some specific controls to interact with it. The box gets most of the attention, but it's the electronics inside that do the heavy lifting.
When I started the project I wasn't married to any specific technology as long as it was able to run the emulators I wanted to use (more on emulation can be found on that page, so you don't have worry about what I'm talking about right now.) At this time MAME (an emulator I want to use) doesn't run natively on Apple hardware using the iOS ecosystem. There are various hacks to make it work, but I decided I didn't want to hassle with an extra layer of complexity, not to mention the premium price one pays for Apple hardware. So that option was ruled out.
I gave a good deal of consideration to using a Raspberry PI device. This won the price war by a long shot, as one can buy a PI for well under $100. The trade-off for this low price is limited processor power. While many of the older (early 80s) games I would be using would run fine on a Raspberry PI, I wasn't sure about some of the newer games I wanted to play (late 80s.) In the end I decided the lower price wasn't worth worrying about the frame rate while I'm playing Xybots.
So that pretty much left me in the PC world. I was OK with that, given my day-job primarily exists within the PC world. So I started searching for a PC for my project.
Given that I didn't want to emulate the newer games and systems (for the most part anything after about 1995,) I didn't need a bleeding edge machine. At the same time, I didn't want to buy something that would turn into a thorn in my side with the next operating system update.
After shopping around, I wound up purchasing a refurbished (off-lease) Dell PC at a big discount over new. This system had an Intel I7 chip, 16 gigs of RAM, 256GB SSD drive, and a dedicated NVIDIA video card. It came with Windows 10 64 bit Professional as an operating system. Even being a few years old it was still overkill for what I needed, but for $400 I thought it was a good deal and a decent compromise between price and performance. While this computer is likely more than what I need, I can rest at night knowing that it's not going to suddenly become completely unusable in the next year.
Along with the computer stuff, I also purchased a second 2TB external drive. I will use this drive to back up the system after I spend hours getting everything configured exactly the way I want it. I will probably also send a backup copy of my system to the cloud as well. The saying in the IT world is if your data doesn't exist in at least three places, it doesn't exist.
For the monitor, as I already mentioned in the "things I didn't care about" section of the planning page, I didn't need to deal with the hassle of locating and utilizing an original arcade CRT monitor. A plain old modern LED computer monitor would be fine. I'm going to mount it behind a pane of glass and a bezel, to hopefully somewhat hide the fact that it's more-or-less a modern flat screen TV.
I didn't need a top-of-the-line high resolution computer monitor either. The vintage games I would be playing originally ran on low resolution screens, so an inexpensive monitor would be plenty. I measured things out and decided that a 24" monitor would be the right size for the cabinet I'm building. I purchased one on sale for about $100.
One downside to modern 24" monitors is the aspect ratio is different from the vintage arcade games. Back then the standard aspect ratio of all screens (computer, arcade, televisions, etc) was 4:3, which meant that the measurement of the screen in one direction was 3/4ths of the size of the measurement in the other direction. In the last 15 years or so aspect ratios have become greater. The monitor I purchased has a 1.78:1 aspect ratio, which means the measurement in one direction is about 9/16ths the size of the measurement in the other direction.
In simpler terms, a vintage 24" monitor would have been huge compared to a modern 24" monitor. The modern monitor will be slightly wider than the vintage monitor, but noticably shorter in height than the vintage monitor. This means that vertically oriented games (Pac-Man, Donkey Kong, etc.) that used an old 19" monitor would have had a visible area almost 16" tall, whereas on my modern monitor the visible area will only be about 12" tall. So that's one of the big trade-offs to using a modern monitor.
To deal with this issue, many home arcade game builders will decide on an orientation, and build a cabinet specifically for those games. Then they will build another cabinet to run games of a different orientation. I'm not very interested in having multiple cabinets. Well, let me rephrase that: I don't have room in my house for multiple cabinets. So I'm going to use one cabinet for both, and concede the fact that vertically oriented games will be a little smaller.
On the positive side of using a modern monitor, they are much cheaper to buy and (if necessary) replace. They are about 10% of the weight (or less.) Mounting them is relatively easy. They don't require a special adapter to get your computer to use them as a display. They use much less electricity. They automatically turn themselves on when they receive a signal. They don't require soldering up a special power connection, and they don't risk electrocuting you if you forget to discharge the tube while poking around behind them. In my case I decided the positives outweigh the negative of the smaller vertical screen.
One of the things that makes an arcade cabinet an arcade cabinet, and more than just an expensive way to play games on your computer is the controls. Buttons, joysticks, track balls, spinners, etc. These will be the primary ways you interact with the computer when it's sealed up inside the big fancy box.
It's possible to go the cheap route and use PC joysticks, keyboards and mice to play most of the games. But if you're going to do this you might as well just place your computer on a desk and be done with it. Plus you could also use the computer to balance your checkbook (anyone remember checkbooks?)
Instead I decided to go with real arcade controls. I did a bunch of research and wound up making a huge purchase at Groovy Game Gear. They had most everything I needed. Happ buttons, 4/8 way switchable joysticks, 3" track balls and even weighted spinners. I went to town and probably spent too much, but I got a ton of control options to play almost every game you can think of.
The only things I haven't gotten (yet) is a driving controller for racing games and some guns for shooting games. My cabinet design will support the addition of them, but I decided that's something I could add on later. Same with a Star Wars style yoke controller. I think of the three the driving controller would be first. I've never cared for the shooting games so that may never happen (plus, with an LED monitor the shooting game options are limited.)
As an aside, halfway through the project I got a great deal on a reproduction Star Wars yoke. There was a big 50% off sale that made the purchase a little more reasonable. It's still a splurge, but less of a splurge than the full-priced control. Plus, the controls made by this company are top quality. However, I did not have the control panel for it built yet, so that's why it's not included in any of the pictures.
In order to make these raw controls work with the computer, I also had to buy a couple interface boards. One of them (KeyWiz40-ST) takes all the button and joystick inputs and converts them into keyboard presses that the computer can understand via a legacy PS/2 port on the computer. The other board (Opti-Wiz 3) takes analog inputs from the track ball and spinner controls and converts them into what the computer recognizes as a USB mouse.
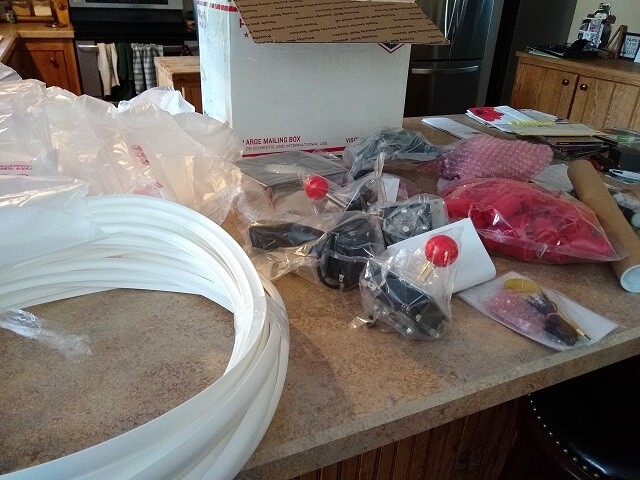
For weeks I was getting packages in the mail. My kitchen counter often looked like this:
Obviously, video games heavily rely on sound for background music, effects and even audible cues as to things happening within the game when your eyes are focused elsewhere. So I needed to integrate some speakers into my cabinet.
Many people who build cabinets buy regular computer speakers and figure out a way to mount them. They may even go so far as to disassemble the speakers and audio controls from their original cases so that they can mount them more seamlessly into their cabinet. This seemed like a lot of extra work to me, so I decided to just buy raw components and save the hassle of disassembly.
For speakers, I bought a pair of 5 1/4" coaxial speakers, and an 8" subwoofer speaker. Because I was going to be mounting them in my own cabinet and just needed the raw speaker components, it was cheaper to go with speakers marketed towards car audio. For the most part, car audio speakers don't care if they're mounted indoors. As long as the amplifier running them is rated for the same impedence then they will be fine. Car audio speakers are generally rated at 4 ohms impedence.
A cheap little amplifier to run these speakers was bought. I didn't need a nice enclosure as I would be mounting it in my cabinet. I also didn't need a ridiculous amount of power as I'm probably not going to be playing Zaxxon at full volume. What I purchased was pretty much a small circuit board with knobs mounted on one side, which was perfect for what I needed. It was capable of driving speakers at 4 ohms, so I didn't have to worry about burning it up. It was a 2+1 amp, which meant it had outputs for the two main channels and a third output for the subwoofer. It was rated at 200 watts (50+50+100) but I'm guessing that's a peak power rating and actual output is much less. However, even if it's only putting out half that amount it will be more than enough volume for my needs.
Oddly enough, the amp didn't come with a power supply. It needed a 24V DC regulated supply, so I bought a $20 laptop power supply that fit this bill.
As I quickly discovered, there were a ton of other smaller hardware bits (both electronic and non) that I needed as well. My shopping list was constantly growing almost as fast as I could purchase things. This isn't a comprehensive list, but gives you a good idea of the type of things I needed to buy:
Speaker Terminal Plate - I bought a speaker terminal plate that mounted on the top of the subwoofer enclosure. It allowed me to easily connect/disconnect the subwoofer if the need arises.
Marquee Light - To make the marquee light up, I bought an LED light designed for the underside of kitchen cabinets.
Cooling Fans - Electronics generate heat, and excess heat leads to electronics death. I purchased a dual fan cooling system designed for media cabinets that will get mounted up on the cabinet top.
C14 Power Socket - I need to get AC power into the cabinet. The cheap approach would be to just drill a hole in the back of the cabinet and run an extension cord out, but I wanted something a little cleaner. I purchased a C14 power cord socket that I can mount on the back of the cabinet. This socket accepts standard C14 AC cords (like what your desktop computer uses.) If you're like me, you have a ton of these cords hanging around so they're easy to find if needed.
Surge Suppression Outlet - Once power was inside the cabinet, I needed an outlet so I could plug in my devices. I also wanted a surge suppressor to protect my expensive project from electrical spikes. Rather than using a plain old outlet, and then from there going into an external surge suppressor, I combined the two and bought a surge protected outlet. This will save space inside the cabinet and make things look a little less cluttered as well. It also was slightly cheaper than buying the two items separately.
Power Relay - One of the cooler things I bought was an IoT Relay. Basically this is a device that I can hook up to a hacked cord inserted into the USB port on the computer, and when the device senses that a signal is coming in from the USB it will power on some outlets. This will allow me to power up the entire system (audio amplifier, marquee lights, button LEDs, cooling fan, monitor, etc.) automatically when the computer powers on. Likewise, when I turn the computer off the whole shebang will shut down without me having to flip a second power switch, or worse yet figuring out how to power each thing off individually. Pretty neat!
Wall-Wart Friendly Power Strip - Because the above relay only had two switched outlets on it, and I needed at least four, I purchased a small power strip that I can plug into one of the switched outlets. I didn't need a long cord (didn't want a long cord, actually) and because my main power outlet has a surge suppressor built into it, I didn't need surge suppression in the power strip either. So at least this let me get away with an inexpensive power strip. Most of the things that would be plugging into this power strip used "wall warts" on the plug side, so I made sure to get a power strip that had wide spaced perpendicular sockets to give them plenty of room.
Ethernet Patch Cables - My modular controls were going to be "hot swappable" via an RJ45 connector. I could have bought a bunch of cable, some RJ45 ends and a RJ45 crimping tool. It was easier and cheaper just to buy a bag of 10 ethernet patch cables and cut them in half, giving me 20 control cables with the RJ45 ends already attached for me.
Ethernet Wall Plates - The aforementioned RJ45 cables needed someplace where they could plug in, so I bought a box of RJ45 wall plates. These would get mounted inside the control panel cavity.
Keyboard Tray Slider - The keyboard tray I was planning to build needed a keyboard drawer slide, so that was purchased.
Drawer Sliders - Likewise, the two lower drawers needed slides so they could move in and out. I went to my local home center and purchased two sets of drawer slides. I wound up getting some rated for 100 pound loads, which is overkill. However, from experience with the cheap drawer slides used on my kitchen cabinets, I decided I would rather have a quality slide that isn't taxed versus a cheap slide that doesn't roll smooth a month after installation.
USB 3.0 Hub - There were going to be a bunch of things that needed to be connected via USB. A keyboard, mouse, external hard drive, wifi adapter, IOT device, and four front-mounted USB extension ports.That's nine plugs, and my computer only had six ports. I bought a USB 3.0 hub for the four extension ports to plug into and then be plugged into the computer reducing the number of open ports needed by three. That gave me just enough ports.
Electrical Boxes - I didn't want to hack together the electrical connections on the inside of the cabinet. The last thing I wanted was for me or another person to get a shock while moving their hand around doing maintenance. So I bought a couple of electrical boxes. One is mounted down low behind the bottom drawer, and covers the exposed back side of the C14 electrical port. The other is mounted up in the main electronics bay and has a standard wall outlet mounted in it.
Door/Drawer Pulls - The keyboard door and the lower storage door needed a convenient way to get them open, so I purchased a set of matching door pulls from my home center.
Magnetic Catches - These same doors need a way to stay shut when I don't want them open, so while I was at the home center I also picked up some magnetic catches.
Piano Hinges - Still on the topic of doors, these doors needed a way to swing open and shut. I bought two longer piano hinges and used a hack saw to trim them down into the correct sizes for the three doors on the project.
Graphics - I wasn't sure if this would be counted under "materials" or "hardware." I decided to include them on this list, although they easily could be placed on the other list. To make this look more like an authentic arcade cabinet, I wanted some graphics on the sides and for the marquee. I visited GameOnGrafix where I purchased some "off the shelf" side art, and had them make a custom marquee with my nickname on it. I was quite happy with the product I received from this company and would gladly use them again.
Casters - This cabinet was going to be heavy. And I was going to have to occasionally access the back of the cabinet for maintenance. Rather than trying to drag a 200 lbs cabinet across the carpet, I went to Harbor Freight and bought some heavy duty casters. HF seems to have the best deal on casters that I've found.
Ground Terminal Strip - All of the control wires share a dedicated ground. In simpler terms, every button and joystick used on the system needs a ground wire that is eventually connected to the ground port on the keyboard encoder. Rather than trying to jam all these wires into the keyboard encoder port, or soldering them together in an unsightly (and unexpandable) way, I decided to use a terminal strip. This strip has 12 ports (you can buy them in different sizes) that are all connected together. I can insert a ground wire into one of the ports and it will be connected to all the other ground wires. This was a much more elegant solution. The only downside was I needed one terminal strip, and they only came in packs of 10. So I guess I have a bunch of them for future projects. The good news is they were inexpensive.
In addition to those things I listed, lots of other fiddly bits had to be purchased. It all added up very quickly.
My wife was really starting to wonder about this project once package after package started arriving at our house. Not to mention all the times I ran to the home improvement store to buy even more supplies. Building an arcade cabinet will quickly nickel-and-dime you to death, so be prepared for this if you decide to build your own.
Enough already! Come along as I start to build the cabinet.
Return To The Main Wood Gallery
This page last updated on 09/21/2023