


With a project like this, it's hard to figure out when it is officially done. The reason is, there will probably be tweaking, configuration changes and enhancements from this point on. I'll think of new things to do, new games to play, changes I want made to how it works, etc. That's part of the fun of this hobby is constantly refining the cabinet.
That being said, after the basic construction was finished I did run into some initial hurdles that I needed to overcome before things were in a mostly-usable state. So I'll mention them in case you want to build your own arcade cabinet. Maybe you'll need to do the same thing, or maybe my troubleshooting will inspire you to think about how you can solve your own unique problems.
The first thing I needed to do before I stuck my PC inside the cabinet was to figure out how to get it to turn on. Obviously, one could press the power button on the PC and it would turn on. That's not the ideal situation once the PC is buttoned up inside the cabinet. I had added a power button on the front of the cabinet which I intended to use to power the PC on and off.
The power switches on most PCs are pretty simple two-wire designs, much like the switch I put on the front of the cabinet. I figured I could just unhook the wires on the PC power button and hook my button up instead. Well, that would work fine if I didn't buy a Dell PC. I discovered that Dell decided to be different from the rest of the world in the way they wire their power buttons. They use five wires. Two are used to control the power, two are used for the two color LED indicator, and a fifth wire is used for the system to detect if there's a problem with one of the other wires.
I did some Googling and discovered that you can't just unhook their wires and replace it with your own, as the system will see this as a fault and give you an error message when the PC is powered on. Nuts.
So I decided to risk bricking the PC, and disassembled it so I could access the wiring harness for the power switch. I then cut it apart, and spliced in a wire to my button in parallel to the factory power button. I then drilled a hole through the PC case to let my wire hook up, and installed a quick disconnect so I could unhook the PC from the cabinet if needed (like when I enlist some help to carry the cabinet up the stairs in a few weeks.)
The wires were tiny, and they left me with no extra slack. It's almost as if Dell never intended for someone to cut their harness apart and hack the power switch.
When I got everything assembled back together, I was about 60% confident that my hack would work. I took a deep breath and pressed the power button on the front of my cabinet. The PC powered up. I felt a wave of relief come over me.
With everything connected, when I would hit the power button the marquee light came on, the control panel buttons lit up and I could hear everything else (fan, audio amp, etc.) "click" as they powered up. It was pretty cool that the IOT device seemed to be working, and was getting a signal from my hacked USB cable. My inner geek was showing.
Except, the monitor was blank. At first I thought it was just powered off and needed to be manually turned on the very first time. I had tested the monitor when I bought it two and a half years ago, so I knew it worked then. Perhaps maybe just being turned off for that long it wouldn't auto power-on when it sensed the signal from the PC? I certainly hope the monitor didn't break while it was sitting and waiting for me to finish the project.
Manually pressing the power button on the monitor got a "no source signal" error message to display for a couple of seconds, then it would power itself back off. The Tundra Boy joined me in troubleshooting. We were trying to get into the monitor menu to see if a setting was wonky, but the monitor would power down before we could get too far into the menu.
After some head scratching, we decided to hook the PC up to a different monitor. That would isolate if the problem was with the monitor, or elsewhere. The Tundra Boy grabbed his monitor from his gaming system that had an HDMI input and brought it into the shop. Rather than plugging it into the IOT device, he just plugged the monitor directly into the wall. We hooked it up, pressed the power button on the arcade cabinet to turn the computer on, and got the same "no source signal" on his monitor as well. Hmmmm… that's confusing. I started to wonder if the HDMI cable was bad, or even worse, the video card on the PC was defective.
Intending to pursue one of those two possibilities, I pressed the button on the arcade cabinet to power everything down. The marquee lights, button lights and fan turned off. Suddenly, the monitor came to life as the PC booted up. Ahhh ha!
As it turned out, I had plugged the cabinet power strip into the wrong outlet of the IOT device. When I would press the power button on the arcade cabinet, the PC would power off, then the IOT device would turn everything else on. Conversely, when I would press the power button again, the PC would power up, then the IOT device would turn everything else off. The exact opposite of what I wanted.
When my original monitor was plugged in, it was being truthful. When the monitor had power it wasn't receiving a signal from the PC (because the PC was off.) When I would hit the cabinet power button and the PC turned on, the monitor would lose power and not display anything.
However confusing it was to troubleshoot the issue, the fix was easy. I switched the outlet where the power strip was plugged into the IOT device. Then everything worked as expected, where all the devices would power up when the PC had power (instead of the opposite.)
The IOT device supports both types of outlets, because there may be situations (not in my case, but other people) where you want things to turn on when another device loses power. I just used the wrong outlet option.
The next thing I noticed was that I wasn't getting any of the PC sounds to play over the cabinet speakers.
I double-checked all my connections, and they looked correct. Then I went into the Windows sound settings and noticed the default sound output device was the monitor. I can't ever think of a time when I would prefer to use the monitor speaker over the cabinet speakers, so I disabled the monitor speakers from the device list.
I thought that would fix the problem, but alas, it did not. So I had to do more hunting.
I then got desperate enough to read the manual of the speaker amplifier (that was a joke, referring to how people seldom read manuals.) In the manual it stated that Bluetooth connections will override the auxiliary input to the amp.
I looked at my phone. Sure enough, it had connected itself to the amp via Bluetooth. It remembered the connection from when I was testing the amp six months earlier. I disconnected my phone's Bluetooth connection and suddenly the amp started playing PC sounds through the speakers like it should.
I was getting closer. I fired up some games to test my controls. The controls were spotty. Some worked fine, others didn't. This led me down the path of figuring out a few different problems.
The first thing I noticed was my three-button panels wouldn't work, but my six-button panels worked fine. That was weird. So I started comparing the wiring of the two. That's when I noticed that on the three-button panels I had connected the ground wires to the wrong wire on the Cat5 cable. I did a little soldering to fix this issue, then the three button panels seemed to work better.
Except only the middle button on the three-button panels were working. To assist in troubleshooting I ran the utility that came with my keyboard encoder. This utility would display on the screen if it is getting a signal from the encoder, and show what key command it is sending to the PC.
That's when I realized that all three buttons were working, but the two outer buttons were backwards. Button 1 was sending the key command for button 3, and likewise, button 3 was sending the key command for button 1.
As it turned out, when I wired the three-button panels, I hooked the wires up to the backs of the button in order: 1, 2, 3. The problem is, from the front side that meant they were wired 3, 2, 1. I just swapped the spade connectors on the two incorrect buttons and then they worked correctly.
For the most part, that fixed a majority of the control problems with the games. I would run into a few where the controls weren't working properly, and learned that the control settings for those games in MAME didn't match my control layout. Changing the settings for the individually affected games fixed the issue. Going forward I will probably occasionally run into this issue as I sort through the thousands of games that my cabinet will play.
The next thing I noticed was that Hyperspin (the game selection menu) worked fine using the joystick, and it wasn't using my control panel buttons correctly ("insert coin" would start the game instead of "go", and "player 1 start" would exit the game instead of the "exit" button.)
Obviously I wanted the control panel button actions to match what they were labeled to do. Also, I didn't want the game selection to be relying on a joystick, as due to my swappable control panels there may not be a joystick mounted. Instead, I wanted to use the pinball flipper buttons on the side of the cabinet to select games. Those would always be available.
Hyperspin is notorious for being a difficult piece of software to understand and configure. It is quite flexible, and looks great, but there is a steep learning curve to making it work. To make matters worse, at some point in time between the start of my project and the time I needed to configure the software, much of the Hyperspin site went down. I say "much of" because the home page still worked. However, the documentation and support pages were no longer available. The message said these pages were down for maintenance. I checked for several weeks and it appeared the maintenance window was going to be perpetual.
Doing a little bit of research, I learned that Hyperspin as a software product was officially pronounced dead on March 3, 2023. No new development will be done on the software, and no support will be provided for existing installations. It sounds like most of the arcade cabinet community was moving to another front end called Launchbox. Maybe down the road I will also make that transition, but at the moment I just wanted to get my existing Hyperspin environment working.
Unfortunately, when I would Google how to use and configure Hyperspin, all of the search results pointed to pages in the Hyperspin which were no longer available. So I had to do it the hard way. I dug around the file system and finally found the configuration files that Hyperspin was using, then figured out how to change the settings to make my controls work the way I wanted. The good news is once it was changed, I shouldn't have to go back and do that again.
The next "problem" was a blessing and a curse. With things mostly working, I realized that the sheer number of games that this system would play was overwhelming. If I was wanting to play "Pac Man", I would have to scroll through thousands of other games in alphabetical order until I finally found it. That wasn't ideal.
So I spent some time going through every game that Mame and Daphne supported, and I created a spreadsheet of the games that I would probably play a vast majority of the time. This narrowed the list down to about 175 games. For now I omitted the racing and pinball games just to start with a more manageable list.
I then wanted to figure out how to create a menu (also known as a "wheel") in Hyperspin that just showed the games I had listed on my spreadsheet. I wanted to still access the other games if I had a whim for something different, but I wanted my preferred list to be the default.
This wasn't as easy as it would sound. Thankfully, I came across the following video which was extremely helpful to figure out how to do it. It still took time (like about 6 hours just to build my XML file) but it let me create a custom menu of just my preferred games.
Ok, this wasn't really a big deal, just more amusing. I figured I would mention it for entertainment purposes.
After I got the cabinet up and running, I would walk into my shop and find the marquee and button lights turned on. At first I just figured I had forgotten to turn them off the previous day. After the third time it happened, I decided something was up.
As mentioned over on the hardware page, I had purchased this PC used. It was a machine that came off lease and was resold.
Well, apparently whoever owned the machine before wanted it to be up and running for them when they came into the office every morning. I found that the "auto power on" feature in the BIOS was enabled for 5 AM every day. So that solved the mystery.
It was simple enough to turn it off. Like I said, not a big deal, just kind of funny.
There were some other things I needed to configure. These weren't really problems, so much as configuration things that make the cabinet more usable.
I made a local Windows account (no password) for the arcade cabinet user, then set that account to automatically log in when the PC is powered up. As I have decided to revoke WiFi access to the PC (see below), having no password on the local account shouldn't be a security problem. Someone would have to have physical access to the cabinet to hack into it, and frankly there isn't anything on it that would be valuable to them if they did. The computer would still present a login screen if the PC woke from hibernation (rather than booting from complete shutdown.) I had to do some hunting and figure out a setting deep within the bowels of Windows Pro to allow the system to auto login after waking from hibernation. It's a separate setting from automatically logging in after powering up. Who would have thunk?
When powering the cabinet up, I put Hyperspin in the start up folder. This way it will automatically launch without someone needing to open the keyboard cabinet and access the mouse. With the above two changes, any person should be able to press the power button and in a few seconds find themselves in Hyperspin and ready to play games.
Similarly, I changed the windows settings so when the power button is pressed to turn everything off, the PC hibernates. That's easier on the operating system than just pulling the plug every time I'm done using the cabinet. Also, by hibernating rather than doing a full shutdown, the system starts back up much quicker and it returns you to the exact place in Hyperspin where you left off.
One of the problems that a lot of game cabinet builders have is that they will get everything perfectly stable, then a Windows update gets installed that breaks things. Some of the game software is pretty antiquated, so newer versions of the operating system aren't guaranteed to be backwards compatible. To prevent this, I disabled the WiFi connection. Without WiFi, the PC can't download updates. Of course, that also means that security updates won't get installed, but again, with no access to the outside world this shouldn't be an issue. Any files I need to transfer on or off the system will have to be via sneakernet, but this shouldn't be a big deal.
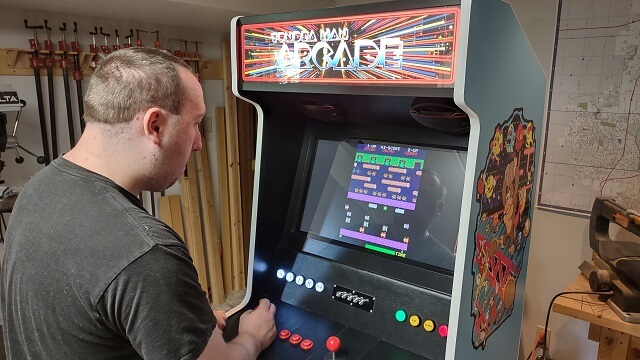
With the cabinet mostly sorted, I could now pronounce this project "done." Here's the Tundra Boy giving it a test run with a game of Frogger.
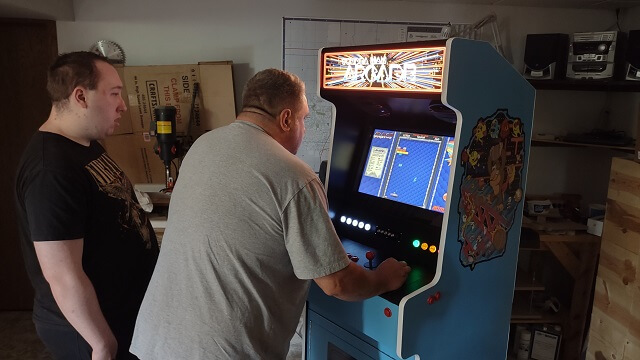
The cabinet quickly became a hit with anyone who came over to visit. Here's a member of the Tundra Boy's band taking a break from band practice to play a game of Contra:

My brother came over one afternoon and he and the Tundra Boy had an Arkanoid tournament:
As mentioned, upgrades and updates to the cabinet will probably be perpetually ongoing. I already have a list of things I want to do in the future:
- Move the cabinet out of the shop and into our office room upstairs.
- Build a steering controller panel for racing games. I purchased the wheel control shortly after I finished the cabinet.
- Build a panel to mount a Star Wars yoke that I purchased in the middle of this project.
- Add a USB interface for legacy Atari 2600 and Sega Genesis controllers.
- Add Visual Pinball and get pinball emulation running.
- Set up some legacy PC games, like Doom and Monster Truck Madness.
Lots of tools were used in building this cabinet. Here's an in-depth explanation of the tools I used.
Return To The Main Wood Gallery
This page last updated on 09/21/2023