


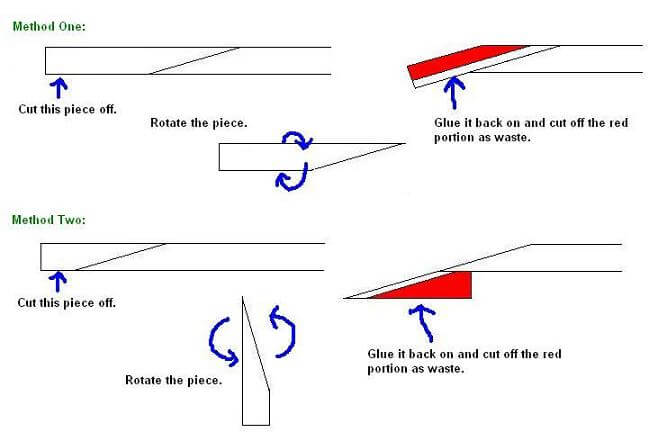
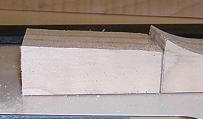
Now that my blank stock was ready, I took one of the neck blanks (with the 3 pieces of maple) and began work on the neck. The first thing to do is cut the scarf joint, which will allow the headstock to be angled back (in this case 10 degrees). There are two ways to do this, both which have their pros and cons. I've illustrated the two methods in the picture below. The debate on the two methods and their characteristics and which is better to use is beyond the scope of what I want to get into here, and actually has proponents on each end of the fence. Let's just say that after measuring my neck stock I discovered that I didn't have quite enough length to do the second of the methods, so the decision was an easy one for me.
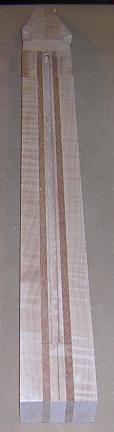
To begin, I had to do some drawing and measuring on the side of the neck blank to determine where the scarf joint should be cut. This took some head scratching, but after a while I think I had it worked out. Then I remembered that I didn't account for the peghead veneer and this would affect the final measurements, so I had to erase it and do it again. Then I did it wrong, so I had to erase it and do it a third time. Finally, I was fairly satisfied with how it was looking. As we'll see below, I still didn't have it right.
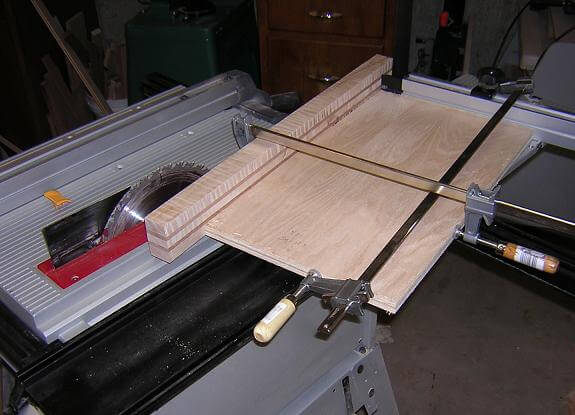
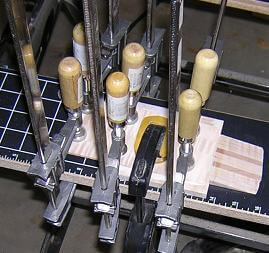
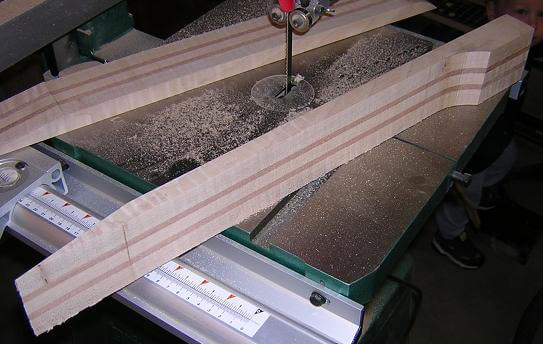
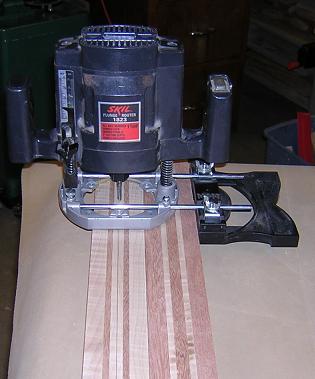
To cut the scarf joint, which is at 10 degrees, I set my sliding miter table to 40 degrees, clamped a square piece of stock to the fence, then clamped my neck blank to the square stock. I had to fiddle with things to make sure they were aligned correctly. You can see the setup in the following picture. Note that the angle of the picture makes it look like I'm going to run my clamp right through the saw blade, but rest assured, there was at least 1/2" clearance.
If someone doesn't have a tablesaw with a sliding miter table, I'm not sure how they could accurately cut this joint without a mess of planing and shaping later. I had to do a fair amount as it is, even with a pretty smooth cut.

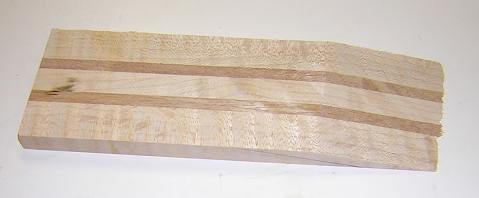
The headstock will be 1/2" thick, including a 1/8" laminated piece of maple. This means that the scarfed piece of the headstock should be 3/8" thick. I cut this at the table saw.
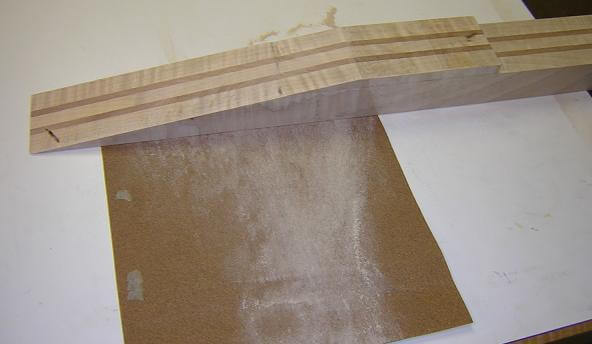
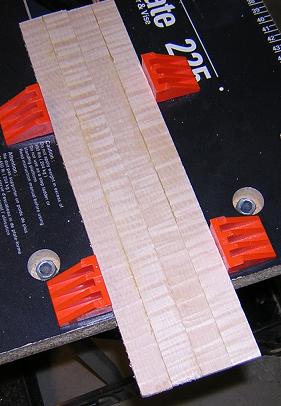
Once the piece was cut, I taped it back onto the neck and began to sand the scarf joint to make both faces exact. I did this by clamping a piece of sandpaper to the workbench, and slowly running the face of the scarf joint across the paper, only going in one direction and making sure that the face stayed flat. After approximately 490 strokes (I counted 'cause I had nothing else to do) and two sheets of sandpaper, the joint was acceptable. The photo below was taken after 100 strokes, so the joint isn't yet acceptable.
Now I ran into my next problem. When I layed out the original scarf joint, I didn't account for the saw kerf in my calculations. The net result of this error is that my headstock piece is approximately 3/4" shorter than it needs to be. You wouldn't think that an 1/8" error would cause a 3/4" discrepency, but it does on a 10 degree cut! Clearly I was going to have to find a way to make the headstock piece longer. In addition, (and I knew about this one before hand) the headstock piece was slightly too narrow to fit my designed profile. So I was also going to have to glue on some "ears" to the headstock to make it the right size.
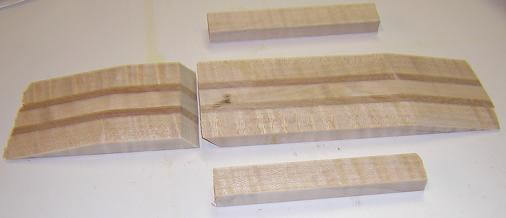
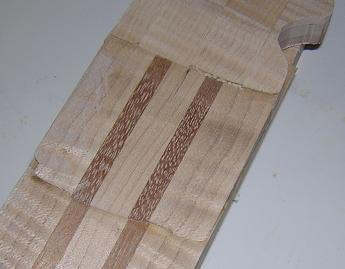
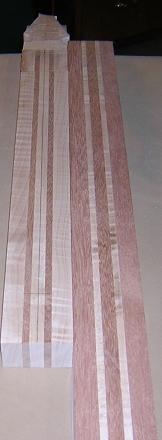
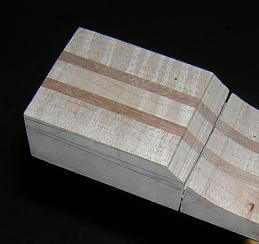
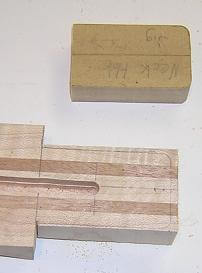
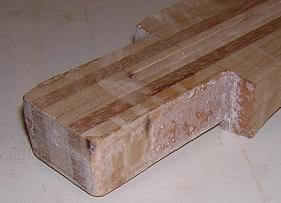
I started with the process of extending the headstock piece. I took a scrap of the neck from the scarf cut, and cut it down to 3/8" wide on the table saw. Admittedly, this was a scary cut, as the scrap piece was only about 5/8" wide to begin with, and I had to run it through on edge (2 1/2" tall). I used a couple of push blocks to make sure my hands kept far away from the blade. With the piece cut, I mitered the top of the headstock piece and the bottom of the scrap piece at a 45 degree angle. Gluing it this way would give a slightly stronger joint than just butt-jointing them together. While I had the fence set, I also cut some scrap maple down to be the headstock ears. The top side of these parts would be covered by the headstock veneer, so the joints would only be visible on the back. Here are all the parts of the headstock, prior to gluing them up. Note that the scrap piece I used to extend the length (on the left side) had a tapered end. This was residue from the scarf joint cut, and it would be cut off later.
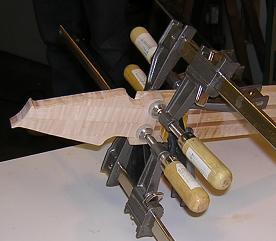
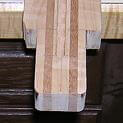
First I glued on the headstock extension:
Then I glued on the headstock ears:
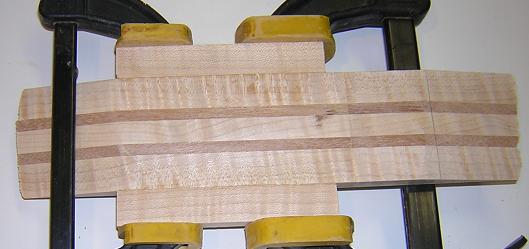
To make the veneer that would cover the face of the headstock, I actually pulled out some chunks to flamed maple that I had in my scrap bucket (off-cuts from my chess pieces.) I edge glued them together to make a wierd, patterned veneer that isn't typical, but is kind of cool and different. By the way, you'll notice that I do a lot of clamping on my Black & Decker Workmate. These are extremely handy for clamping up odd-shaped things (like four 1/8" pieces of veneer!) As an added bonus, it's very portable so I can glue the pieces up in another room and leave my workbench free for other activities.
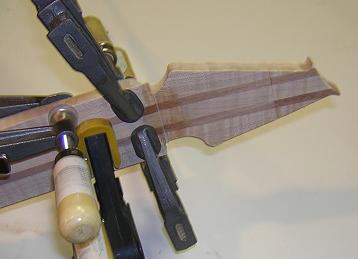
I gave the headstock veneer a good sanding, cut off about 7 inches of it and glued it to the headstock assembly.
In the planning stages, I had drawn out a headstock profile I liked and worked out the size. I took a copy of this profile and glued it to a piece of 1/4" hardboard to use as a template. I cut the template out on the scroll saw and drilled holes large enough to allow me to slip a center-punch through to mark the proper tuning peg locations on the headstock.
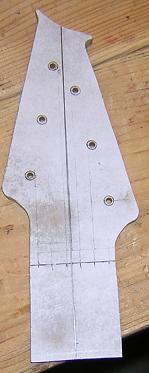
Next, I used this template to trace the pattern onto the headstock piece I had glued up. I made sure to keep the center lines of the template and the workpiece aligned. I also marked the hole centers for the tuning pegs while I had the template in place.
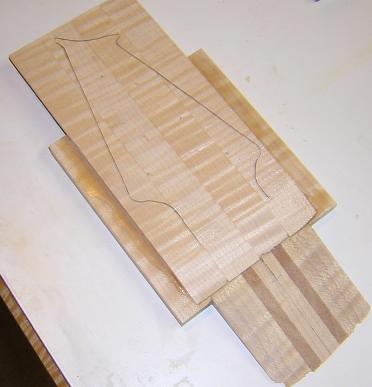
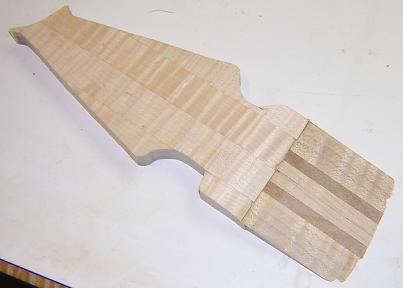
I used the scroll saw again to cut out the headstock. I will wait to drill the holes for the tuning pegs once the pegs arrive (mail-order) so I can ensure I drill the proper sized hole.
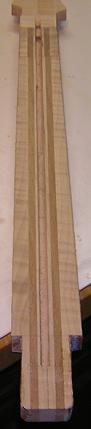
It was time to cut the neck profile (height). I began by marking my truss-rod depth at the nut (7/16") and adding 3/16" to that amount for a total nut depth of 5/8". I then marked my depth at the 12th fret area at 11/16" and used these two marks to draw a line the length of the neck blank. I arrived at these measurements by using a dial caliper and measuring the neck on my Parker, which has the best feeling neck of the guitars I own. I then had to subtract 1/4" from these measurements to account for the fretboard height. On the body side of the neck, I marked off a line where the neck tenon would start, then drew in a curve from the tenon to the depth line. The actual profile of the curve wasn't that important, as I will be carving away a large portion of it when I join the neck to the body. Sorry the lines are so hard to see in the photo below.

With the neck marked, it was simply a matter of bandsawing down the line and cleaning up the cut with a little sanding.
At this point, I attached the headstock to the neck. With that long, low angle scarf joint, this was a tricky glue up as every time I tightened the clamps the headstock wanted to slide down the neck. I had to go very slow, and as I discovered after the glue had dried, I did get a little creep (about 1/64") but it was small enough to deal with.

Frankly, I wasn't real pleased with how the glue-up turned out. Thankfully, with some filler and some sanding, the gaps should disappear and the evidence should be covered with the fingerboard.
The following photo shows how little of a gap this actually was, but the guitar neck needs to be dead-on flat prior to attaching the fingerboard, so I'm going to have to address this before continuing.
To fill in this gap, I took some (what I thought was) maple sawdust out of the shop-vac, mixed it up with some glue, and spread it out over the low spots. A little thick, but what the heck, I'll just sand off the excess, right?
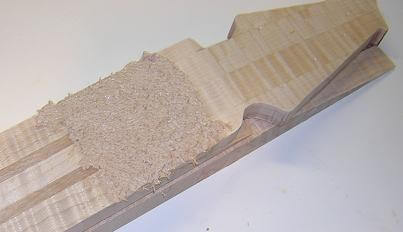
While the glue was wet, the filler matched the color of the maple perfectly. However, as the mixture dried, it got darker and darker. Well, as it turns out I remembered that in addition to maple sawdust, I had forgotten about the hardboard and MDF sawdust that I had also sucked up in the vacuum. Arrgh! Well, thankfully it was going to get sanded down to a very thin layer, so maybe it wouldn't be that big of a deal in the end. After the mixture had dried I sanded everything flat. The area that I filled in turned out to be extremely thin, so while it was a little bit darker I think would work OK in the end.
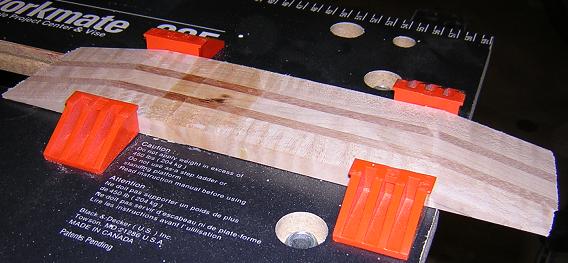
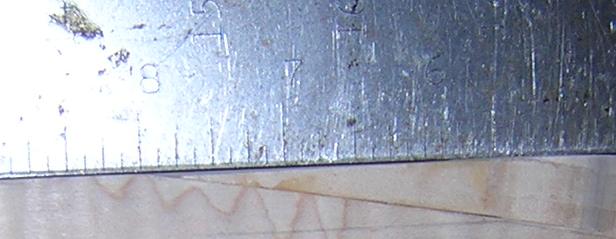
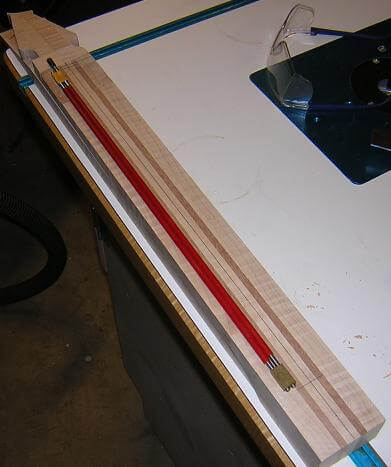
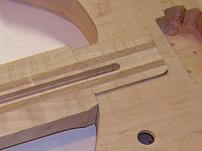
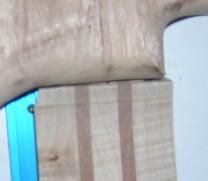
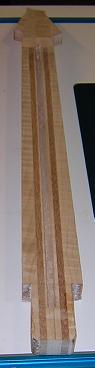
Now that the scarf joint was completed, it was time to rout the channel for the truss rod. First, I layed out the start and stop marks on the neck blank. You can see the truss rod here, sitting next to the center line I drew on the neck. The channel would need to be 1/4" wide and 7/16" deep.
Here's where I discovered the pitfalls of cutting the headstock prior to routing the truss rod channel. To guide the router down the center of the neck, I attached an edge guide. This worked great for most of the neck, but the section of the headstock where I graphed on the ears stuck out further than the edge of the neck blank, which made it impossible to move the guide far enough up on the neck. My solution (or so I thought) was to grab the 2nd neck blank I had made and use double-stick tape to attach them. Then I could run the edge guide on the straight portion of the 2nd blank and cut my channel.
This worked well in theory, but once I began the routing I would run into trouble. The channel was going to be deep enough that I wanted to rout it in multiple passes. On my intial pass, I looked down in horror to see my channel anything but straight. As it turned out, the tape had come loose due to the torque of the router pulling the neck blanks apart, which caused the channel to drift. Drat!
I decided the tape route wouldn't work for this application, and instead just clamped the two pieces together. I hadn't used clamps in the first place because doing so would require that I keep stopping the router and repositioning the clamps, and I wanted to try and avoid that annoyance. In retrospect, it was a lot less annoying than routing a squiggly truss-rod channel. I went back to routing, hoping that I could salvage the neck when I discovered the router was drifting again. What the?...
This time the screws holding the edge guide on the router had come loose. In a fit of rage I tightened them down way tighter than they were probably designed to take, but I was going to make darn sure that that router didn't drift again. I finished the pass, then adjusted the router to final depth and made another pass. This second pass was actually straight, however at one point I heard a loud BANG and something bounced off my safety glasses. Glad I was wearing those things, as upon examining the router bit when I was done, a bit of the carbide edge had snapped off and gone flying. That bit went in the trash. After way too much anguish for what should be a fairly simple procedure, I finally had the truss rod slot done. The top portion wasn't exactly straight, but it fit well in the bottom portion and I figured it would do. The truss rod manufacturer recommends placing spots of silicone in the slots to keep the truss rod from rattling. I'll just need a little more silicone than normal. Looking at the photo, the picture doesn't do justice to how terrible the truss rod slot actually looks.
Next on my list was to cut the tenon on the end of the neck. Because I was working on multiple parts of this project simutaneously, I already had the pocket cut in the guitar. The neck was going to be set back 2 degrees from level with the face of the guitar. There are two ways of achieving this angle. One is to route an angled pocket in the body, and the other is to cut an angled tenon on the neck. Simply out of a manner of preference, I decided to go with the angled tenon.
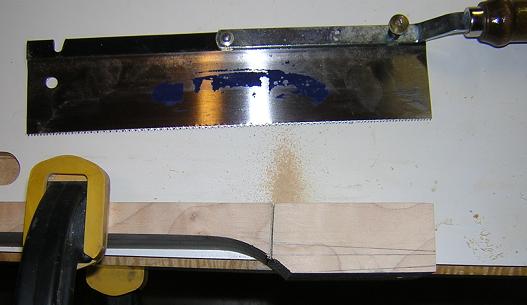
I started by cutting the shoulders of the tenon's side and back with my dovetail saw.
Next, I cut the bottom of the tenon on the band saw, forming the two degree angle.
Then, I roughed the width of the tenon on the band saw, attached my jig that I had created to the end of the neck, and routed it to final dimensions using a pattern-cutting bit.
Now it was time to test fit the tenon. Hmmm. A tad loose. Not horrible, but more than I wanted, especially considering that this is the join that passes the vibrations from the neck to the guitar body. A tighter joint means more efficient string energy transfer and therefore more sustain. I'd have to shim this up a little. Also, turning the guitar over, I discover how inaccurately I'd cut (or marked, not sure which was the culprit) my shoulders. There was quite a bit of gap that I'd have to shim back there as well.
Unfortunately, I discovered a bigger problem. When laying a straight-edge down the center line of the body, the end of the neck was about 1/2" off center. What?!!! Upon closer examination, I discover that I routed the neck pocket on the body out of square. AAAAAUUUUUUUGGGGGGGHHHHHHHH! Things are going downhill really fast. I took my calipers and measured how far off it was, and it turned out to be slightly less than 1/10th of an inch. That little bit was extremely noticable at the nut end of the neck, though, and the guitar wouldn't be playable unless I addressed this issue.
I decided to try building up the tenon with sawdust and epoxy in various spots to try to move the neck into correct position. I guess at this point I should have been thankful that my neck tenon was on the loose side, as this allowed me some wiggle room to achieve this without having to pare away a large portion of the tenon. Small consolation at this point. I pared away a little, and built up other parts of the tenon. I also used the epoxy/sawdust mixture to try and fill in the gaps around the shoulder.
After spending a little time shaping and tweaking, I had the neck sitting straight in the pocket and fitting nice and tight. There were still some shoulder gaps, but I decided I could deal with them later. I was starting to realize that this guitar would have some warts, but hopefully I could salvage things well enough to make the instrument playable. The tenon sure is looking ugly, though.
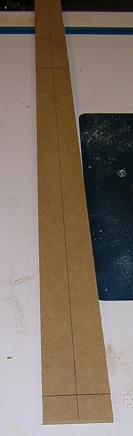
The tapered neck width had not been cut yet, so that was the next item on my list to tackle. I considered several options when thinking about how to taper the neck. The first was using a tapering jig on the table saw, but I wouldn't be able to stop the cut easily to avoid lopping off the headstock. Another option was the band saw, but I wasn't sure I could be accurate enough to make the profile exact. I decided to make a template out of hardboard and again use the flush cutting bit in the router. Man, when I bought this bit a couple years ago I had no idea I'd use it so often in just one project! I carefully marked and cut the jig to provide a taper that would be 1 11/16" at the nut and 2 1/4" at the 22nd fret. Then I used that template to draw the rough shape onto the top of the neck.
I rough cut the taper on the band saw, just so the router wouldn't have to work as hard to do the final cut.
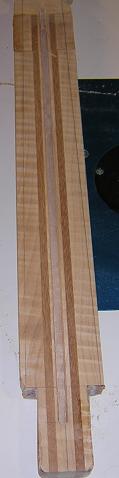
Then I attached the jig to the neck with double stick tape, making sure to align the center line of the jig with the center line of the neck, and routed the taper. This actually worked well, which was a nice change for the way the rest of this neck was going. With the taper cut, it was beginning to look like a real guitar neck, rather than just a hunk of laminated wood!

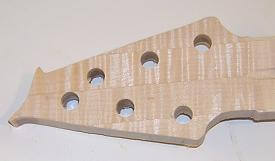
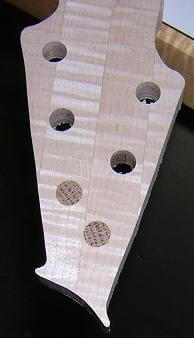
I figured this would be a good time to drill the holes for the tuning keys. I had marked the positions with a center punch when I originally laid out the headstock shape. It was simply a matter of using a 3/8" forstner bit in the drill press to bore the holes. Because of the angle, I had to support the headstock on a block to keep it flat.
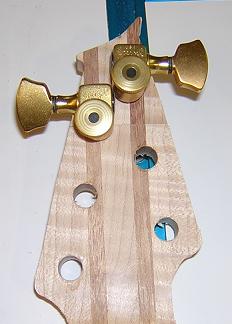
Of course, the way this neck was going there was no way I wouldn't hit a snag with the tuning holes! When I originally designed the neck, I took the tuning machine dimensions off another guitar I had, which had the standard Grover/Schaller type tuners. I should have thought ahead and measured my guitar that had Sperzel tuners, as I was planning to use Sperzels on this guitar as well. Sure enough, when I tried to test fit the tuners, I ran into clearance problems with the top two machines.
I seriously considered mouting the tuning pegs upside down, as this would give me the clearance I needed. Unfortunately, this would also mean that the knobs would turn the reverse way from standard. I figured that this wouldn't be a good thing in the heat of a gig, when all of your other guitars tune normally.
So, I had to determine a method for salvaging the headstock. After a little measurement, I figured out that if I reposition the top hole up 1/8" and the next hole down 1/8", it should buy me the clearance I needed. This would mean that the tuner spacing wouldn't be exact, but I was hoping that this minor discrepency wouldn't be noticable to all but the most discerning of eyes. Besides, with everything else going wrong with this neck there were plenty of other flaws to draw your attention away!
I started the relocation process by plugging the holes with some 3/8 oak dowel pieces I had sitting around. The dowels didn't match the wood, but the 1/8" of oak that would stick out of the edge would be covered by the washer on the front and the tuning machine on the back, so (hopefully) the fix would be invisible.
After the glue was dry, I sanded them flush. Then I marked the relocated positions and returned to the drill press with a 3/8" forstner bit.
Then everything went south.
As I was drilling my first hole, I was nearly all the way through the wood when the dowel plug let go and came flying out. The drill bit shifted slightly, and what I wound up with was a large, non-circular hole in my headstock. My only guess is that the glue in that hole had not fully set, or the dowel forced all of the glue out of the joint as I pressed it into place, which left the joint glue-starved. In any event, the plug did not hold.
I sat there heartbroken, knowing that the only way to fix this would be to try and drill out this larger hole with a bit (I'd guess 5/8") and plug it with another dowel and try again, but I knew that there was no way to make this fix invisible. This repair would be painfully obvious, and there was no guarantee that I wouldn't run into the same problem again.
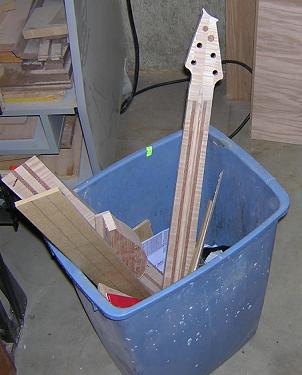
With all of the other issues with the neck, I decided it was time to concede defeat and chalk this neck up to a learning experience. I certainly had learned a lot. I already had a second neck blank glued up, so I was ready to go in that respect. Unfortunately, the first neck blank contained most of the pretty figured maple I had found (another argument against using really good wood for your first guitar) and the second blank was mostly mahogany. Hopefully with all my new found knowledge I can sidestep many of the issues I had when making the first neck.
Here lays the mortal remains of the first neck, may it rest in peace.
Let's try this again. Here's the next page where I make a second attempt at building a neck.
In case you're wondering about when I glued up the stock for the second neck, you can go back to the stock preparation page.
Return To The Main Music Gallery
This page last updated on 06/28/2018