


Now the real fun begins, as we're on the last step of finishing the guitar! Mostly this is just standard bolting and soldering stuff. Anyone who's ever built a guitar kit or even done any mods to their own instrument have probably done most of these things already.
To begin with, a majority of the holes I'd drilled for the hardware had some finish seep into them and shrink their diameter slightly. To alieviate this, I took the correct sized drill bit and ran it through all the holes to clean them up. In most cases I was able to just spin the bit by hand, but a couple of them were pretty tight so I wound up having to chuck the bit in my drill. I wanted to make sure to spin the bit slow, though, so as not to take a big chunk of the finish with the bit.
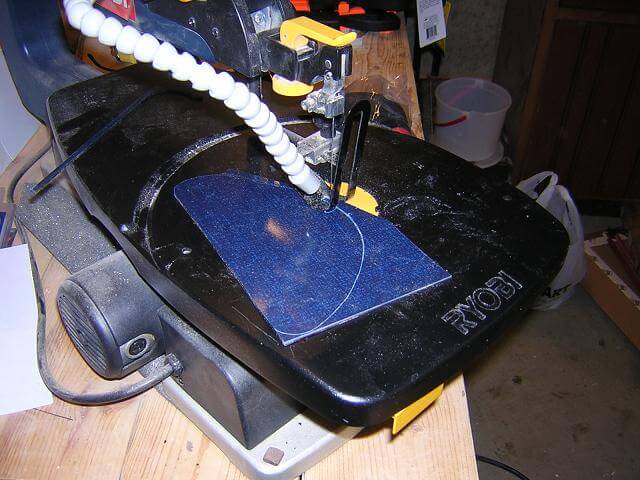
First, I needed to make a couple of control cavity covers. I used a black plastic sheet that Stew Mac sells as pickguard material. I took the routing templates I'd used to make the control cavities, and scribed a line onto my material. Then I used my scroll saw to cut out the material just to the inside of the scribed line. With a little fine tuning to get the fit nice, I drilled holes in the plates and countersank them so the screws would fit nice.
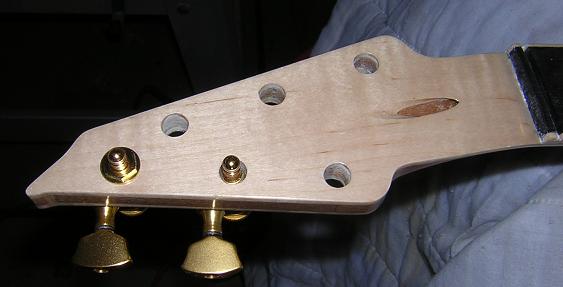
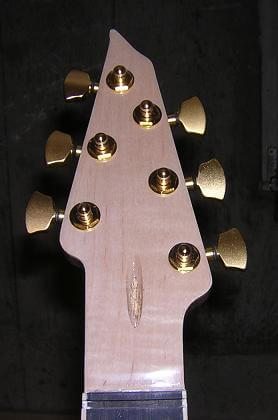
The tuning machines were next. The Sperzel tuners I used fit through the back, then had a bushing with a hex nut that slipped through the front over a washer and held everything together. I used a six point deep socket and was careful not to chew up the nuts, which is easy to do.
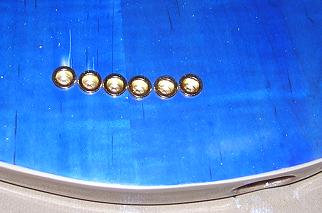
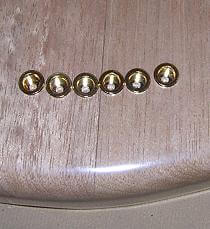
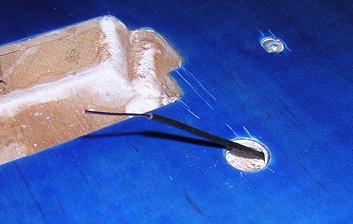
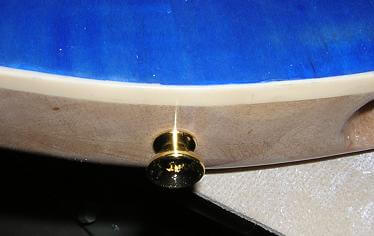
The string ferrules were pretty easy. The holes were tight enough that I didn't need any glue; just pressing them into place held them firm enough. I used a block of scrap wood over a rag to give me enough pressure to get them seated. I put ferrules on both sides of the guitar. The back ferrules will actually keep the string from pulling through, and the front ferrules will keep the string from chewing up the top of the gutiar. Note the finish crack above the left-most ferrule. Bummer!
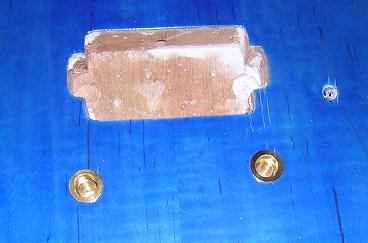
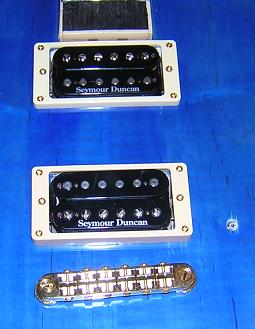
Next up, was the bridge. One of the things that would have been easy to forget is the ground wire. The ground wire is what connects the bridge (and therefore most of the rest of the metal parts of the guitar) to earth. I had already drilled the hole before I finished the guitar. I slipped a wire through and stripped one end. The stripped end was tucked down into the post hole, and friction will give it connection to the bridge insert.
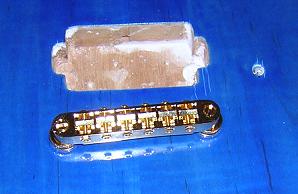
Then I installed the bridge inserts in much the same way as the ferrules above; just pressing them into place. They took some good, firm pressure to get them seated fully. Once they were in, it was just a matter of threading the posts into the insert, and slipping the bridge in place. This is where the dead-on accurace of the bridge post holes makes itself apparent. There is no room for any slop, so the holes had to be precise. Thankfully, they were.
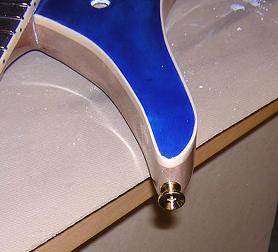
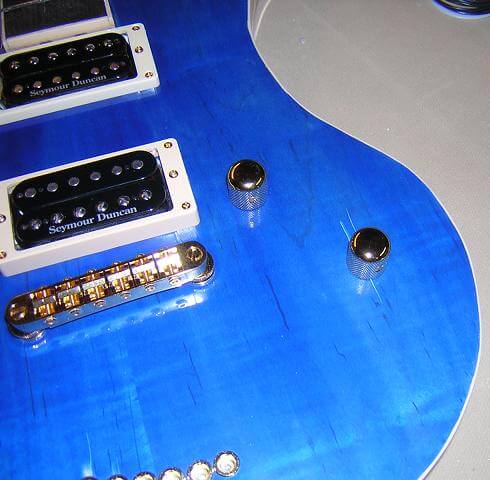
Installation of the strap knobs was simple. Just screw them in place. The only trick was that the holes weren't pre-drilled, so I had to be careful not to slip with the drill and mess up the finish.
Now it was time to start with the wiring. I wired up as much I could with the components outside of the guitar. This gave me more room to work, and fewer opportunities to stick a hot soldering iron through my guitar finish.
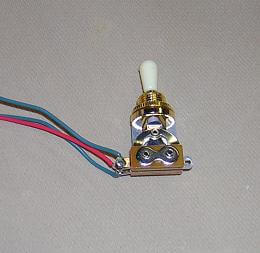
I began by installing the three-way switch. The green wires will be from each pickup, and the red wire will be the return wire that goes to the volume knob.
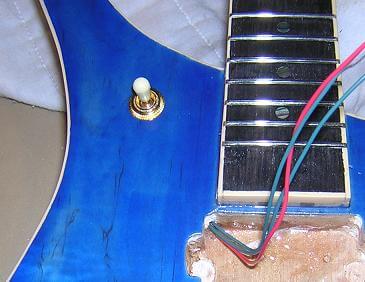
I pressed the switch into the cavity (tight fit) and made sure to leave enough slack in the wire where I could pull the switch out to do maintenance later, if needed. The wires were pulled through the hole I drilled to the neck pickup cavity. A thumb nut holds the switch in place on the front of the body.

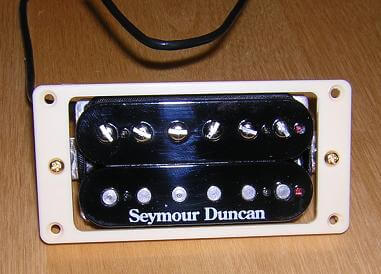
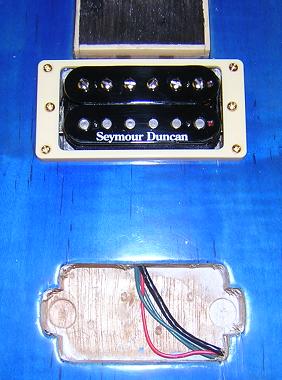
The pickups are held to the front of the guitar by plastic "rings". I mounted each pickup into their respective ring, making sure the top of the pickup was oriented with the top of the ring (they have an angle to them, so they're not reversible.) The pickup has two "ears" on either side where a screw passed through the ring is threaded. This screw goes through a spring, which provides tension and keeps the pickup from rattling around. By turning this screw, the height of the pickup in the ring can be adjusted. I used the springs that came with the pickups, but later found that even if I compressed them completely I wasn't getting enough pickup height. I realized this after I had the guitar strung up and started playing it. At that time I ended up removing the pickups from the guitar, cutting all the springs in half, then reinstalling them. The shortened springs then allowed me to get the pickup height correct. More on that later.
Then each ring was mounted to it's respective spot on the top of the guitar. A screw at each corner holds the ring in place. Again, I had to make sure to be careful when drilling the holes into the finished guitar, and to leave enough slack in the wiring where I could remove the pickup, if needed. The wires were pulled through the holes drilled between the body cavities.
The output jack was next. It simply was slipped in place, then the nut was slid over the wires from inside the control cavity, and tightened to hold it securely.

The switch, pickup and jack wires were then soldered up to the volume and tone pots. Because I used push-pull pots to control series/parallel switching for each pickup, the wiring wasn't as straighforward as most guitars. With the soldering done, I slipped the pots into place, and tried to arrange the wiring as neat as I could. The wire cap covers the connection where all of the ground wires are soldered together.

I slipped the knobs over the pot shafts on the front of the guitar, and tightened the set screws to hold them in place.
All that was left was to string it up, and adjust everything. I don't have pictures of this process for several reasons. The biggest reason was that I was getting pretty darn excited to play the guitar, and I was in a hurry. Another reason is that setting up a guitar is fairly in-depth, and there are a lot of other resources to learn these skills that probably would do a better job of describing it than I could. Finally, most people who've gotten this far reading the construction process of this guitar, probably know how to do the setup anyway.
That being said, here's a basic description of what I did and in what order.
First, I slipped the nut into place in the slot on the fretboard. I purchased my nut pre-slotted, otherwise I would have had to mark and file the string slots at this point.
Back when I'd installed the truss-rod in the neck, I had left it slack. I now put about 3/4 of a turn on it to offset the string tension. I would still have to adjust it once the strings were brought up to pitch, but I figured this would give me a good starting point.
Next, I put the strings on. I just pulled each one through the ferrule from the back, over the bridge saddle, nut and around it's respective tuning peg. I didn't cut off the extra string at this point, because I knew I would probably be removing them once or twice before I finished and I could use the extra length. I stretched out the strings a little bit by hand, to take a bulk of the slack out of them.
Then, I got the bridge height set to it's "ballpark" spot. At this point I noticed that I made a slight error in my neck angle, as in order to get the strings off of the frets, I had to get the bridge way up there. I'm not sure if I calclulated incorrectly, or cut the tenon inaccurately, but either way, it was higher than ideal. Not so high that I ran out of bridge adjustment though, so I guess I got lucky there.
At this point I started checking the string height at the nut. I was thinking that it would start out high and I would have to deepen the nut slots, but the opposite was true: the string height at the nut was too low and I had lots of buzzing with open strings, that went away if I fretted the string at the 1st fret. Because the string slots weren't that deep, I couldn't just fill them and re-file. Instead, I removed the strings, then shimmed up the nut to raise it slightly and get it correct. While I had the strings off, I rubbed a pencil in each slot on the nut to get some graphite in the slot and assist with lubrication.
Once the nut height was correct, I brought the strings up to pitch. Being brand new, they required a little more stretching and retuning until they stablized. I then double checked my nut height to make sure the open strings rang true.
I could now fine tune my bridge height. I lowered it until the strings started buzzing, then raised it up again until they stopped. This took a lot of trial and error, as I had to remove tension on the strings to take pressure off the bridge posts and allow me to adjust them. Lots of fiddling until it was about right.
At this point, I noticed that the action was good and the strings rang true on the upper frets, but the farther down the neck I fretted (the lower notes), the more the strings buzzed. I sighted the neck and saw that there was quite a bit of backbow. I had put too much tension on the neck before I strung it up. I slowly adjusted the truss rod, removing the tension until the notes played cleanly on all frets. I would give the rod aobut 1/4 of a turn, then wait a few minutes to let the neck "relax" into it's new position. I would then test it again and repeat the process until the neck sighted correctly and all notes fretted cleanly. By the time it was adjusted properly, I had ended up removing the tension on the truss rod completely, which tells you how rigid a laminated neck can be! So more or less, the truss rod is in this guitar to deal with future neck movement, but at the moment it's not being used.
Now it was time to set the intonation. I used my chromatic tuner and went string by string. I would adjust the open string until it was at proper pitch, then I would fret the string at the octave (12th fret) and see if it was in tune there as well. If it was sharp, I would move the bridge saddle for that string further away. If it was flat, I would move it closer to the neck. Amazingly, three of the strings wereintonated perfectly right off the bat, and the other three needed less than 1/8" adjustment. That still amazes me. I've bought new guitars that needed more adjustment!
Next, the pickup height needs to be set. This is done by ear, plugging the guitar into an amp. We want the pickup set high enough to give a strong tone and low noise, but not so close to the string that it pulls the string out of tune. We also want to adjust the respective heights so both pickups have about the same amount of volume. At this point is where I ran out of adjustment on both pickups, as mentioned above, and had to remove them and cut the tension springs in half. This again is due to the problem with the neck angle being slightly too steep.
Finally, it was a matter of playing and tweaking. The bridge height and truss rod each needed a little more fine tuning, but this was only discovered through playing the guitar and making the minor adjustments. Believe me, at this point it was a pleasure to play the guitar and tweak! I played the guitar until my fingers hurt, then took a break and played it some more.
The very last thing to do, once everything was tweaked and the bugs were worked out, was to sign the project and screw on the control covers!
Click here to see the finished photos!
You can also go back to the finishing page.
Return To The Main Music Gallery
This page last updated on 06/28/2018