


I'd put it off long enough, and now there was no way around the fact that it was time to tackle the fret work. I had never done any fret work of any type previously, and it seems to have an aura of mystery surrounding it. People who do immaculate fretwork are heralded as gurus, and guitarists lay their axes at their feet in humble hopes that the powers held within their hands will smile upon their fretboards. The aged old man, with a long flowing beard and dressed in sackcloth, slowly looks up from his bench. The wisdom in his eyes extends far beyond even his significant earthly years. A brass hammer is wielded in his right hand and in the other, a pair of end nippers. "Who believes himself worthy enough to request my talents be laid upon the frets of this guitar?" I wept, because I realized there was not one worthy to break the seal on the sacred tool box...
Wow, where'd that come from.
Anyway, I was somewhat aprehensive about tackling the installation of the frets. I had purchased the Stewart MacDonald "Fretwork Essentials" tool kit, that came with a book by Dan Earliwine on how to do fretwork. I also had the chapter on fretwork within Melvyn Hiscock's book as a guide. Earliwine's book was geared more towards the topics of re-fretting instruments and maintaining vintage appearances, rather than fretting a new neck. Hiscock's book didn't go into the detail that Earliwine's did. So between the two, I gained a general understanding of the process.
As I describe the fretting process, keep in mind that I am describing what I did to fret the neck. This doesn't mean it's the proper way or the only way. Think of me as an impartial reporter, simply relaying the facts of what I did. Hmmm. Me being both the subject and the impartial observer; if that doesn't scream schitzophrenic, I don't know what does.
To begin with, we have to obtain fret wire of the desired size, that matches the slot thickness cut in the fingerboard. I prefer a larger fret, but this is simply a matter of taste. Others like the low, flat frets of old Gibsons, or the narrow taller fret of old Fenders. The frets I selected had about the width of the old Gibsons, but the Height of the Fenders. They weren't the over-the-top "Jumbo" frets that are available, but they were on the larger size. One advantage to going with a higher fret, especially for fretwork newbies like myself, is that it gives more fret height to work with when filing them later. I purchased my fret wire from Warmoth, based on price, but it is available through most any luthier supply company.
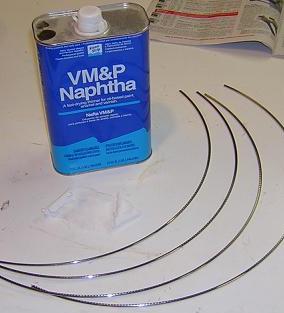
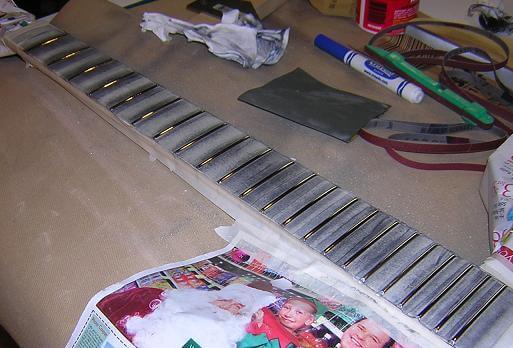
Fretwire comes with a thin coating of oil on it (I assume to discourage corrosion) which has to be removed prior to installing the frets. This is especially important if you're gluing the frets in place, which I'm not. To remove the oil, I simply wiped the fretwire with a rag and naptha until I stopped getting gunk off of it.
The next step is to bend the fretwire. This can be done while the fretwire is in one long piece, or one could do it individually after each fret is cut to length. They make fancy benders and special pliers to do this job, but one could make due with a couple ordinary pliers and some patience. If you have strong fingers, you could even do it by hand but it would be a pain (both literally and figuratively!)
The goal of bending the fretwire is to get it to match the radius of the fretboard. If you are hammering the frets in place (which is my plan) you must actually put a tighter radius into the fret wire, as the hammering process will tend to flatten it out.
Having said all that, my fretwire came pre-bent for which I was very appreciative!
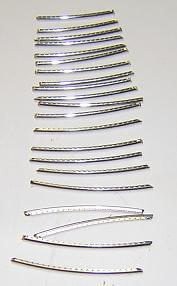
Next, I wanted to cut the frets to size. Initially they need to be about 1/4" over-sized, as they will get trimmed flush after they've been installed. I discovered that a sharp end cutter is very useful in this situation. I thought for the rough cutting that I'd "save" the blade on my good cutter, so I used my old one to cut the frets to length. After I had them all cut, I discovered that the cutter edge wasn't sharp enough to cleanly cut the fret, and that on each end the tang was bent over and the fret end was a mashed mess. I had to go back through with my good cutter and trim the mashed ends off of each fret so that the tang ends were nice and clean. After this trimming, a few of the frets were left short, so I had to discard them and cut new ones. Luckily, I had ordered some extra fret wire.
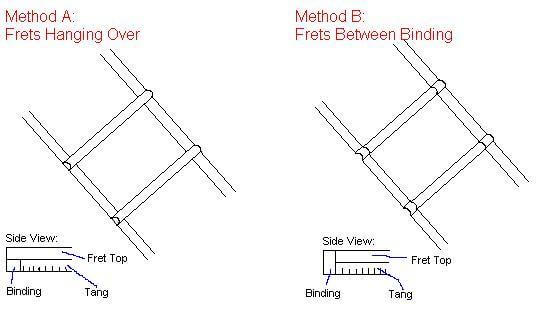
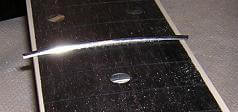
Being that my fretboard is bound, I had to approach the fretting in a different manner than an unbound neck. In unbound necks, you can just hammer the frets in and cut them flush. In a bound neck, however, the binding covers the edge of the fret slot, preventing . This means that you need to handle this in one of two ways. The picture below demonstrates the two most common methods. In method "A", the tang of the fret is cut to fit between the binding, and the tops of the frets are left overhanging. In method B, the entire fret is cut to fit between the binding and the top of the binding is raised up in a little "hump" to match the fret end.
I suppose there's a third method where you just cut the slot through the binding, but that negates the main purpose of having a bound neck: to cover the edges of the fret slots. Don't ever cut through binding like this. If you feel this need, please put a helmet on.
Many Gibsons use method "B". I don't think it looks as good as the other method, so that's why I decided to go with method "A". In addition, if you are going to use method B, you have to wait to level the binding with the top of the fretboard until after the frets have been installed. Seeing as I had already leveled the binding, method "B" would have proven to be a challenge.
So, in order to use method "A", I had to undercut the tang of the fret on each side. I cut enough of the tang off to give me a tang length of about 1/8" less than the width between the binding. I used my end cutters to cut the tang away, although Stew Mac sells a nifty little tool that does in neatly and cleanly in one snip. Might be a tool to consider the purchase of if I decide to make a lot of guitars. After the tang has been cut away, a little of it remains underneath the fret top. I used my fret file to remove this remaining hint of tang piece.

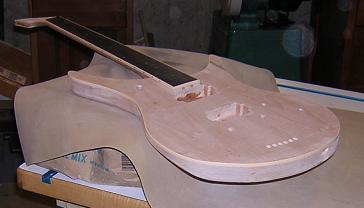
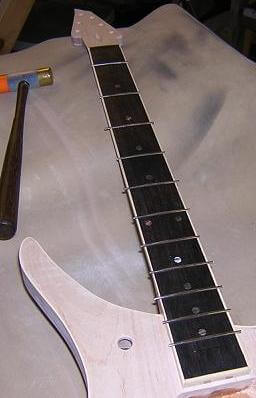
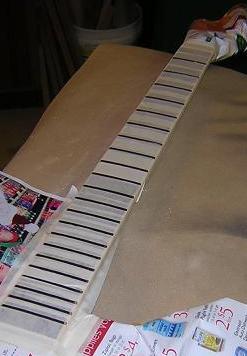
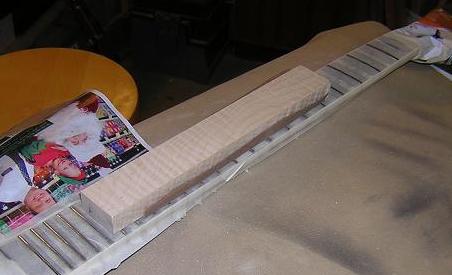
Once all of the frets were cut to length and notched, it was time to hammer 'em in. I needed a solid place to rest the guitar neck, so I placed a back of Quickcrete on my workbench, and put my sanding pad on top of it. This gave a solid surface to support the neck, but protected the back of the nect from damage.
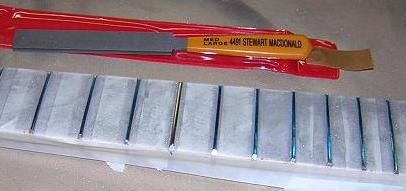
Some of my fret slots had accumulated some binding cement and sawdust, so I took a little pick from my X-Acto knife set and cleaned the slots out. Here are the two main tools I used for hammering the frets in place:
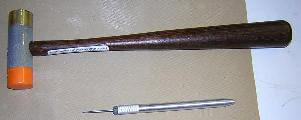
Hammering the frets went pretty well. I used the brass side of the fret hammer, which is soft enough not to mar the fret. I started by tapping the ends into place, then using firmer blows starting in the middle and working my way out. When hammering near the edge of some of the frets, they had a tendancy to "see-saw" in the slot. I had to make sure that I didn't unseat the other side when hammering in an edge. I made sure that the overhangs were tight up against the binding.
I found what worked best was to use a smooth, firm hammer stroke that didn't allow for any rebound. I didn't deliver a death-blow, but I didn't slowly tap-tap-tap them in place either. I found that five or six firm shots would seat the most of the frets adequately, but a few frets needed ten or more.
Rather than just starting on the first fret and working my way down, I started on the 12th. Then I did the 14th, then the 10th, etc. working my way out from the center on each side, doing every-other fret. Once I reached the ends, I started to fill in the missing frets, again starting in the middle and working my way out until all the fret slots were full. I had read somewhere that one should do this, but I don't remember why.

One little thing I discovered the hard way: if you miss the fret with the hammer, you'll put a nice dent in the top of your fretboard. I've got a couple little divots I'm going to have to attempt to sand out. Another imperfection to add to the multitudes on this guitar!

With all the frets in place and seated (and double checking them to make sure they're all snugged down and even) it was time to remove the excess fret hanging over the edge of the binding. I took my end cutters and snipped each fret flush.
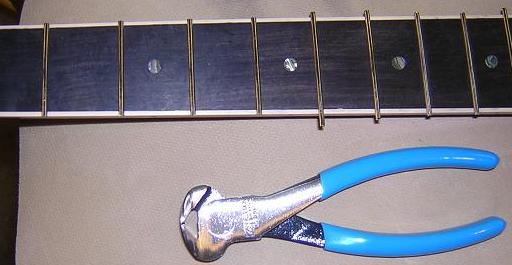
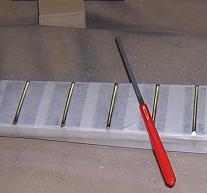
To remove the sharp edges on the end of the frets, I took my fret file and beveled each side of the frets at approxiately 45 degrees. This took longer than I expected. It also was more difficult than I expected to hold the file at an accurate angle. For future necks I'm going to look at building/buying a beveling jig that will hold the file at a precise angle. This bevel is a very visible part of the fretwork, and unfortunately mine doesn't look as good as it could. Every time I'd pick up the file to check my progress or to rest, I'd set the file back down on a slightly different angle. The bevel turned out to be slightly rounder than I had intended. Not horrible, but nobody is going to confuse this guitar with a Hamer.

After the frets were beveled, it was time to level the frets. The picture below outlines the basics of this process.
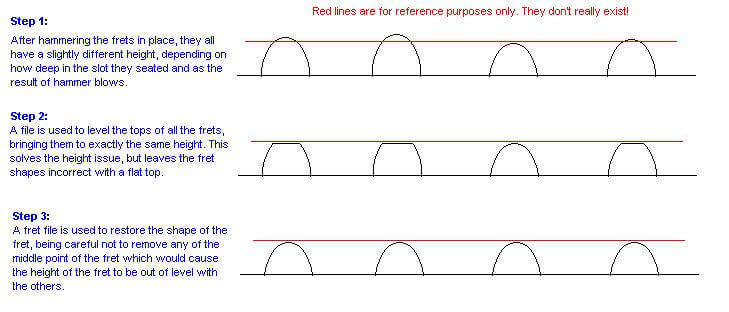
This process creates a lot of metal shavings and gunk, so I taped up the fretboard and surrounding areas so that only the frets are visible. I figured this was easier than cleaning the fretboard later.
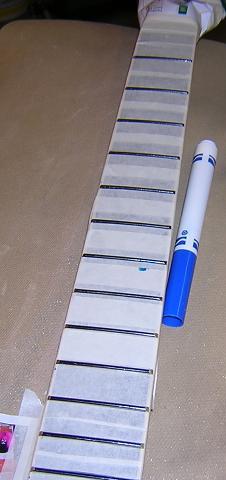
I ran a blue marker along the top of each fret to help me with the next step
I took my file and started filing the frets, running the file the whole length of the fretboard and moving it across the neck so that the entire fret surface was covered. It was important to do this process in good light, to see where the file had shaved off the top of the frets and where it hadn't (hence the use of the blue marker.) I filed until the whole width of every fret had scratch marks from the file and all blue marks were gone. The file was pretty agressive, and in retrospect I probably took a little too much off the top of the frets. Melvyn Hiscock recommends the use of a whetstone to do the leveling as it's much less agressive. However, the fret tool kit from Stew Mac included a file, so I decided to use it instead of spending more money to obtain a stone.
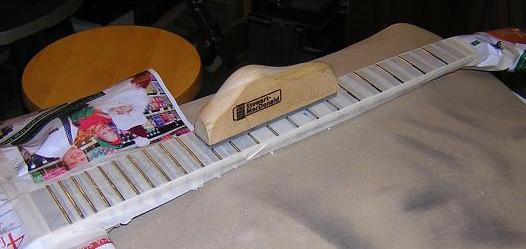
Once the all the frets had been marked with the file, I switched to sandpaper on a wood block that I had double-checked for straighness with my straight edge. I started with 100 grit until the major scratch marks from the file were gone, then worked up through 600 grit to smooth the frets.
Now the frets were all the same level, but the shape of the frets were incorrect. Some of the frets had quite a bit of the fret crown removed, while others didn't have much. The goal at this point was to restore the fret crown (shape) without changing the fret's height. I began this process by again marking the top of all the frets with blue magic marker. This would help me determine when to stop filing. I used my fret file and filed the top of each fret, until just a tiny portion of the line was left in the center of the fret crown. By leaving this line, it ensured that I hadn't changed the height of the center of the fret, just the shape. This was probably the most tedious part of the whole process.
As I filed the frets I checked each one with the "fret rocker" that came with the fretting kit, which is essentially a small straight edge designed to span three frets and determine if any of the frets are low or high. I wanted to be careful not to file a fret too much and cause it to become lower than the others, as the only good remedy for this situation is to pull it and pound in a new one. After much work with the fret file, I finally had all the frets restored to their proper shape.
The edges of the frets where they made the transition from the top of the fret to the bevel were somewhat rough. I used a needle file (included in the Stew Mac kit) to round over this transition and remove any sharp edges. It didn't take much filing on each fret to accomplish this task. Sorry I didn't get a photo of this process.
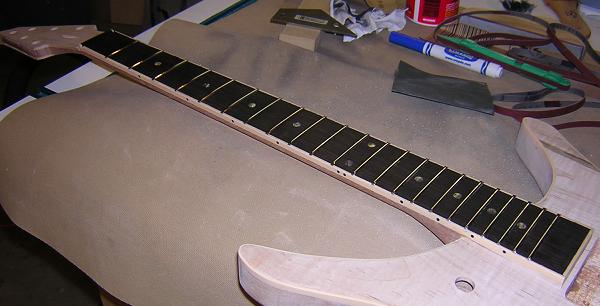
Now the frets were all the same height, the proper shape, and didn't have any burrs on the edges. They did, however, look terrible. Kind of like the frets on an old guitar you see hanging in the pawn shop that had a hard life and was never cleaned. The filing process had left lots of scratches all over the frets, leaving them dull and rough looking, rather than the shiny polished frets one is used to seeing on a brand new guitar (of which this guitar is a prime example.)
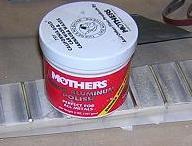
I took some 600 grit sandpaper and sanded each fret to remove the scratches. Then I did it again with 1000 grit paper. After that, I grabbed my jar of Mother's Mag Polish (I knew being a motorcyclist would come in handy) and polished each fret until I could comb my hair in their reflection (well, comb a hair, as the frets are pretty narrow!) This is the part of the process for which I was most thankful that I had taped off the fretboard, as the polish made a big gooky mess.
Once the polishing was done, I removed the tape and gave the frets a final go-over with a rag. Well, they were nothing if not shiny! The final verdict on my first fret installation will occur when I string it up later on down the road. Hopefully any issues I run into will be easily addressed and won't require a complete refret!
With the fretwork complete, it is now time to apply the finish.
If you missed the final construction details, they can be found here on the previous page.
Return To The Main Music Gallery
This page last updated on 06/28/2018